Showing posts with label House. Show all posts

7.07.2011

I've Got a New Way to Walk....Walk, Walk!

I have no idea where that song is from, but whenever I think about walkways (and especially my own), this song pops into my head.  Weird, right?  I honestly think it might be from an episode of Sesame Street....oy!

But enough trivia for the moment, let's get down to business.  So, as you have probably already guessed, this post has to do with my walkway.  I have been not-so-silently scheming and dreaming since we moved in to replace the uneven, rickety brick walkway that leads to our side door.  Not only is it an eyesore, but it is actually pretty dangerous to walk on at this point (since I haven't really seen my feet for a few weeks now).  The hubby and I have talked about getting it done before the little bundle of joy arrives, but we hadn't really planned much further than that.  Or so he thought.......

We had originally planned to go away for the fourth of july weekend, but I hadn't been feeling great towards the end of the week and we have been on the go so much that we decided to cancel.  And since we didnt' really have other plans lined up, I thought, why don't we tackle the walkway!  And by we, I mean him.....and my rockstar parents!  Trust me, I tried to help out, but everyone kept yelling at me to sit down and rest.  I know that I'm 8 months pregnant, but I hate sitting around and watching other people do work.  I like to get in the action and get my hands dirty!!!  So....instead of helping them with the walkway, my mom and I worked on weeding and planting (which she did all of since we've heard bad things about pregnancy and soil - I guess the chemicals in some fertilizers and soil can be really bad for unborn babies, so I stuck to yanking out weeds and trimming bushes). 

So here is what we started with on Saturday morning (Hi Mom!). 


The bricks really didn't bother me (from an asthetic perspective).  In fact, I took a drive around the neighborhood (since it was WAAY too hot this weekend to walk) and everyone in the neighborhood has brick walkways.  Either there was a sale on it when our houses were all built, or it is just the traditional Hingham style.  I'm not exactly sure, all I know is that the old, dirty, worn-out bricks that made up our existing walkway just weren't cutting it.  We considered reusing them in a different pattern once we re-leveled the ground, but after more thought, and a few trips to Home Depot to check out their patio stones, we realized that we ultimately wanted a change.  So, anyone that is looking for about a thousand bricks (there were some stacked up in the garage when we moved in as well), just let me know.  I'm actually thinking about putting them up on Craigslist to see if anyone bites.  I'm not sure what the going rate for bricks is these days, but maybe I'll just do a $__ + pickup deal and hope that someone wants to haul them away!! 

But back to the project!!  Let's fast forward to Monday night (yes, it took almost three full days of work to get er' done, but it was worth it).  Here is the "after" photo:


I love it!!  I can't tell you how happy I am with it.  What do you guys think?  I feel like it brightens up the area so much and the landscaping doesn't hurt to spruce it up either.  There is still more work to do (adding crushed stone along the foundation to keep out bugs and moisture, fixing a few of the trim pieces that are rotted out, replacing the molding around the door (since the current stuff is just not beefy enough for me.....nor is it tall enough, and replacing the steps).  After we started laying the stones, we realized that we didn't love our steps anymore since 1) they don't match the new walkway and 2) they are really dingy and starting to chip around the edges.  So, I called a local mason and he is coming later this week or next to re-face both the front and side-door steps with some limestone to match the new walkway.  YAY!!  So, once that is done, I will do a full before and after post with a little tutorial on patio/stone-laying (since it was our first time tackling a walkway).  I might drag B in to help out with that post, though, since he honestly did most of the work!!  I can't even begin to take credit for this one...they wouldn't even let me pick up the individual stones...haha!! 

But, while the boys were busy doing the heavy-lifting, my mom and I cleared out the jungle that was taking over the front of our house (and the side next to the walkway).  When we bought the house, we learned that the previous owner was an avid gardener.  Unfortunately, though, she became rather sick and wasn't able to maintain the outside of the house (or the inside, to be honest) for the last few years, so it was pretty unkempt when we moved in last year.  The good thing is, though, that there was a lot of great plants to work with around the house, they just needed a little love.  So love we gave them.....tough love.

Here is the before picture of the front of the house (SCARY!!):


I can't believe we had let it get so bad.  We had talked about tackling the landscaping, but with a whole acre of weeding and edging, it just seemed too much to handle.  So, instead of tackling the whole thing this weekend, we just decided to focus on the front of the house (since we were sprucing up the walkway anyway).

Here is where we ended up on Monday evening:


Again, we are not totally finished with the makeover (we are going to add a hydrangea to the front of the walkway in that empty corner, and add the crushed stone along the house), but it is definitely an improvement from before.  I was grinning from ear to ear as I watered the plants on Monday night after the dust had settled, literally, and everything was picked up.  My parents are seriously amazing.  They stuck it out with us all weekend and helped us push through.  In fact, most of the time, they were still going strong while B and I were sitting in the shade taking a breather!!  I have mentioned it in the past, but I just want to reiterate that we couldn't get done HALF of the work that we do on our house without their help.  They are our own little extreme home makeover team and we are really lucky to have them around!!!  So, if you are reading this, thanks guys!!  We owe you!!

So that's it for our little weekend transformation.  Hopefully we will have the steps finished in the next few days and the crushed stone all laid along the foundation.  I will definitely report back as progress is made.  But for now, you can find me standing out on my new little walkway just taking it all in!

6.15.2011

Washer and Dryer Replacement

My original thought was to title the post "So fresh and so clean clean..." but I wasn't sure if anyone would get the reference.....so I went the boring route.  For any of you that know what I'm talking about though, good song, right??  Haha.  I actually can't get the song out of my head as I'm typing this.  Does it make you want to get up and dance?  No?  Maybe it's just me.....

But, I digress, back to the point.

As I mentioned a few weeks ago, we have been on the hunt for a new washer and dryer ever since our 1960's dryer went caput.  Wa waaa.  It was definitely not something we had budgeted for, but we figured that it wouldn't be very efficient to hang dry all of our clothes when the new baby comes.  As much as I enjoy the simpler things in life, I doubt I'm going to have that much time to spare come August.  So the hunt began.....

We asked around for suggestions and recommendations from friends and family, then we scoured the good ol' internet for consumer reports and reviews.  After much deliberation, and a few visits to our local big-box stores (it's so much better to see an item in person before making a big purchase), we made a decision. 


The LG Electronics 3.5 cu ft. Large Capacity Front-Load Washer and LG Electronics 7.1 cu. ft. Large Capacity Electric Dryer from Home Depot.  They were running (and I believe they still are) a 10% off promotion for all Energy Star Appliances, so they ended up being $629.10 each with free shipping.  Definitely not cheap by any means, but they are extremely energy efficient and will save us on both water and electric bills over time.  Plus, we were able to get free shipping and free haul away of the broken dryer!!  YAY!  We didn't have them take away our existing washer though, since it was only about a year old when we moved in last year and still in perfect working condition.  I actually put it on Craigslist yesterday afternoon and had someone come and pick it up by 6 pm for $200.  Don't you love Craigslist?  Aside from worrying a little that a crazy person is going to show up on your doorstep, it is the best thing since sliced bread.  I have had awesome luck with it in the last few months, so I can't say enough good things about it!  I probably could have listed the washer for more money, but since I was requiring pick-up and haul away of it, I thought that it sounded more reasonable at $200. 

So, all in all, we spent $1058.20 (minus the money we received for our old washer) for a new set.  Even with the savings, it is still a hard number to swallow....especially when you aren't expecting it, but I feel good about the purchase and we are absolutely LOVING the new appliances so far.  The washer detects the size of the load and factors that into the cycle time.  There are a lot of buttons, but for the most part, I keep it on the same "regular/cotton" cycle and let it do its thing.  An average size load has taken anywhere from 44 - 50 minutes.  At first, I thought that it was a bit long for a wash cycle, but the trade off is that it spins for a few extra minutes and the clothes come out super dry, which turns into a shorter amount of time spent in the dryer (=lower energy bills).  It's a win-win!!  And the dryer works in the same way as the washer in terms of timing.  It will detect the wetness and size of the load and then determine how long it needs to go for.  This has ranged from as low as 23 minutes to as high as 40 minutes (although the latter was a bigger load of towels, so I wasn't surprised by that one). 

Overall, I am really pleased with our purchase.  The washer seems to use a lot less water than our top-loading GE Profile but it still seems to be getting everything squeaky clean!  The only thing that I've heard to watch out for with front-loaders is that they tend to develop a musty or moldy smell if you don't wipe out the rubber piece inside the door every once in a while.  Based on some consumer reviews, water tends to get trapped there if you close the door right after removing a load.  I have kept a hand towel on top of the washer lately and just wipe out the excess water after each cycle (which only takes a couple seconds) and haven't encountered the smell, so I think it is just a matter of preventative maintenance.  I have also heard that you can leave the door open and let it air out if that is easier.  Right now, we could definitely do that since our basement is wide open, but since we are planning our basement renovation at the moment which will include closet doors encasing the washer/dryer set, we might not have that luxury down the road (more on the basement renovation in the next week or so).

Oh, and another thing about front-loaders that I want to mention is that they do tend to sit very low on the ground (well, the washer anyway, since dryers are typically front-loading anyway) so we are planning to build a storage compartment/stand underneath with some drawers to house extra detergent, dryer sheets, etc.  We will probably just make it out of extra wood that we have lying around and put cute little handles on it.  I'm not sure of the exact design yet, but as always, I will definitely report back on that project when we eventually map it out and tackle it!  They do sell stands for almost all front-loaders, but the LG ones that fit our appliances were $200 each.....and that was just way too much for us to consider spending when we were already digging deep for the purchase in the first place. 


Above are some examples from the Home Depot website of what the units look like with pedestals (or stacked, as the middle photo shows).  They definitely look nice, and it would be a lot quicker to just buy the pre-made ones, but what fun is that?  We wouldn't be true DIYers if we didn't at least try to make them on our own.  So, more on that in the coming weeks.....
Has anyone recently purchased a new washer and dryer?  Do you currently own the LG models?  Do you love them?  What are your thoughts on the pedestals or stackable options? 

4.15.2011

To Stain or Not To Stain....


Ever since we completed our deck in November (read more about that here), we have been debating whether to stain it or seal it.  At first, I was in the "seal" camp and B was in the "stain" camp.  My opinion was mostly based on the fact that I'd heard/read that sealing it would last longer than stain (AKA less work for us down the road).  But after doing more research and reading up on consumer reports, I found that if you use a good brand, let it dry properly and maintain it each year with a light coat, then stain is just as easy as sealer.  PLUS, in my opinion anyway, stain looks so much better than a simple sealer coat....especially on pressure-treated wood.  If we had done mahogany or cherry, then we would probably lean more towards sealer to capture the beauty of the wood, but PT is just not a beautiful wood.

So......we stained it this past weekend!!!!  YAY!  And when I say "we" I mean B and my dad.  I ran back and forth to the store to pick up the paint (and back and forth to pick up more....and so on)....but I didn't really participate in the paint/stain part of the project.  I'm not going to lie to you, it took them most of the weekend to do it all, but it looks great so I think it was well worth it!!  And I can say that because my back isn't still aching because of it! 

Before we went out to buy the stain though, we talked about what we wanted it to look like.  We are planning to paint the trim of our house white this summer (or next....let's be realistic), so we thought that it would be nice to reflect that on the deck as well.  So, we ultimately decided to go with solid white balusters and railings and a deep reddish brown semi-transparent stain for the floor.  The choice of the floor color came from the wood floors in our house.  Since the deck is really an extension of the kitchen, we thought it would be best to keep the wood colors consistent.  Here are some inspiration photos that caught our eye during the planning process:


Then, as usual, we shopped around a little for the best prices on some of the highest-rated brands (I read a lot of good reviews on Cabot and Sherwin Williams Deckscapes so we focused on those two).  Lowes carries Cabot so we went there first.  The stain was about $33/gallon for semi-transparent stain and $27/gallon for solid white stain (we would need about 3 gallons of each for the project, so we would be looking at about $180 total).  We grabbed them (Cordova Brown for the floor and White for the railings) before heading to Sherwin Williams (since they are pre-mixed colors they are fully returnable).  I fully assumed that Sherwin Williams would be more expensive, so I was banking on keeping the Cabot anyway.  But when we got to Sherwin Williams we found out that they were having a 40% off sale for the weekend on ALL paints and stains, including Deckscapes.  WOOHOO!  Both the solid color stain and the semi-transparent stain were regularly $37/gallon, but with the discount they were only $22/gallon!!  We scooped them up as fast as we could and returned the Cabot ones on the way back home!  AMAZING DEAL!!  So all in, the total was $132......we saved $48!!  It is still a lot of money for stain, but I love it when I can save a little here and there!  It makes it all worthwhile.


For the Sherwin Williams Deckscapes brand, they are only available in custom-mixed colors, so they are non-returnable, but since I knew this was the best deal around I didn't mind snatching up a few gallons.  I chose Riverwood for the semi-transparent color on the flooring and Extra White for the solid color on the railings.  I walked away from the store with only 2 gallons of each (since I wasn't sure how far it would get us and didn't want to waste a gallon if we didn't need it.  Turns out, we ended up needing 3 gallons of each, but since the store isn't far from the house, I didn't mind running back out for it later in the day (especially since I wasn't the one doing the back-breaking work)!!!  The store manager recommended 3 gallons of each to me when I told him that we had about 340 sq ft of deck, but I didn't listen.  Next time, I will trust that he probably knows a little more about this than I do!  Haha!

So, this is what the deck looked like last week (on a rainy day, unfortunately):


And this is what it looks like now:


I am so happy with the way it turned out.  The guys had to do 2 full coats of the white (which is not fun when you are painting hundreds of thin balusters) and 2 full coats of the semi-transparent stain.  They used brushes for the railings and both a roller and a brush (to get in between the slats of wood) on the flooring. 

We considered doing the solid-colored stain for a few minutes, and then decided that we liked the idea of knots and grains showing through a little, so we opted for semi-transparent.  The guy at the Sherwin Williams store agreed that it would not only look nice, it would last a bit longer since you wouldn't notice the fading as much as you would with a solid stain.  We will still have to touch it up every year or every other year, but the big part is done so it will hopefully just be maintenance from now on.  I'll keep you posted on that next year though!

Next project on the list: PATIO FURNITURE!!!  I have been scouring craigslist for months and NADA, so I might end up with an inexpensive set from Home Depot or Lowe's.  I have seen BEAUTIFUL sets at Jordan's Furniture and some local seasonal stores, but a $2000 set is just not in the budget for us now.  My neighbor bought an $89 wrought iron table from HD last year and she said it has held up pretty well so far, so I might end up ultimately going that route.  I'll report back tomorrow though.  My dad is coming by to let me borrow his truck, so I'll let you know how it goes.

And as always, if anyone has recommendations for patio furniture that they've bought or that they have seen in catalogs, I'm all ears.  We aren't completely opposed to a teak or other wood material set, but I would RATHER not have to stain the deck and the furniture every year, so a composite or wrought iron would be my first choice.  Any thoughts or opinions on that are welcome too!!  Thanks guys!

2.03.2011

After some thinking....

We're going to stay put for a while.  No more house-hunting or running numbers on mortgage rates.  Well, before I go any further....if you're a bit lost at the moment, check out this post a few weeks back where I shared my CRAZY idea to sell our house and move a few streets over to a bigger house.  I suppose it's not exactly CRAZY to think that we will eventually need more space to grow our family (and potentially house my parents for a few months a year during their retirement), but it is not exactly something that we NEED to worry about for quite some time. 

My new revelation came about this past weekend when I was home alone while B was travelling for work.  I had a few errands to run and places to go both days, but for the most part I was vegging around the house.  And it all just felt right.  I felt cozy and comfortable, and most importantly, safe.  I knew that if I needed anything, I could just swing by one of my neighbors houses and they would gladly lend a hand or an ear.  I also spent a lot of time just absorbing the environment.  We have been so busy since we've moved in that I hadn't taken much time to really stop and smell the roses.....or in this case, the fresh paint.  It felt like home.  It felt like ours.  And it felt good.  Everything is where we want it and we are happy.  So why mess with success, right?  If we need more space in a few years, then we can explore our options at that point.  For now, though, we are going to sit tight and ENJOY the house that we created together.  So I apologize for the fire drill a few weeks back.  Maybe it was hormones or food poisoning....or all the snow...but I assure you that there will be no more talk of moving for quite some time.

1.07.2011

Momentary Lapse of Sanity...

I can't believe I'm even considering this, let alone typing it for all the world to see, but I am thinking about selling the house.  *GASP*  I know, I know.  It hasn't even been a year!  It seems crazy, but I think I found my DREAM home....my FOREVER home.  The one that we could expand our family in and maybe even take care of our parents in down the road.  It is even the house that has the potential space for a design studio (which is really important to me right now, see this post for more on that).  It is just perfect....AND its only a few blocks from our current house. 

Don't get me wrong, our house is great.  And I cannot tell you how much I love the neighborhood and the people.  It's better than we ever imagined!  I just worry that we are going to grow out of it sooner than expected and I would rather pull the bandaid off quick than get even more attached to our current situation.

Ugh, this is so hard.  So, being the crazy list-loving/organizational-guru that I am, I put together a list of the pros and cons of each house.  Here goes:

Current house:

PROS
Perfect size for us now
Exactly how we want it (with all of the renovations)
AMAZING neighbors
Walking distance to elementary school
Safe neighborhood
Quiet cul-de-sac
Good price
2 working fireplaces
Full basement ready to be finished
Conservation land behind us, no building = QUIET

CONS
Will outgrow and need to add on/move in a few years anyway
Only 3 bedrooms (could be 4 if put wall in master bedroom though)
Still need to replace windows
Only 1.5 baths, no master bath
Only 1 acre (although that is really a lot of land)
Wood siding...needs to be taken care of (especially trim)

New house:

PROS
Bigger house
4 large bedrooms
2.5 baths
1.5 acres of land (really large backyard)
3 car garage (we currently have a 2-car) - and room above it for studio!!
Lots of window/natural light
Historic home (1682)
Farmer's porch in the front
French doors in most of bottom floor to separate rooms
Vinyl siding

CONS
More expensive
Have to sell current house
On Main St. (which is oddly desirable in my town, but its still a main road and not as safe as current house)
Need to update kitchen (cabinets are relatively new, but need new appliances and countertops...probably paint cabinets too)
Need to refinish floors

Ok, that didn't really help at all.  There are about the same amount of pros and cons for each house.  I don't know what to do.  I just saw this new house and something clicked.  Maybe I'm just hormonal or something.  But, either way, I guess I'm going to look into it and see what the process would be like.  I actually already contacted my real estate agent and asked what her thoughts were on listing our house.  We would probably want to list our rental property as well, but it seems crazy to do that now when the housing market is still eh.  Who knows what will happen, but I will keep you all posted!!  Wish me luck!

12.31.2010

Year in Review

As we rapidly near the end of 2010, it only seems fitting to look back on what we've accomplished over the last 12 months.  A summary of sorts.  It has been a wild ride since we bought our little casa in February, so I thought it would be fun to take a peak at all that has happened since. 

Here are some of the projects from 2010:

Half-Bath Makeover

(click here for more information on that project)


Kitchen Makeover
(this was by far the biggest transformation....for more
on the process, check here, here, here, here and here too!)


Dining Room Makeover
(click here for more information on that project)


Exterior Makeover
(click here, here, here, here and here for more information)


Hallway Makeover
(click here for more information on this project)


Deck Installation
(click here and here for more information on this project)


Living Room Makeover


I think that's it for the big projects of the year.  We definitely did a lot of other little projects here and there, but these were definitely the most time-consuming.  I can't tell you how happy I am to check these off of my to-do list for the year.

But just as we close out the 2010 list, it's time to put together a new one for 2011......

Here are some preliminary thoughts (I will do another post next week after I reflect a bit more on the coming year)

2011 House Projects
Re-paint office and guest bedroom
Remodel full bath upstairs
Finish basement (w/ half bath??)
Install new windows (DIY or hire?)
Paint garage doors black
Repair cracks in exterior trim pieces (re-paint)
Re-seed lawn, plant, mulch, landscape front & backyard
Finish molding and painting trim around side storm door
Clean and organize remaining boxes/items in garage/basement
Create built-in bookshelves/bench for living room
New roof for garage
Clean and repair gutters
Stain or paint deck
Find cheap patio furniture and refinish

2011 Craft/Art/Design Projects
Print maps of places lived/visited to create frame wall
Print photos for black frames in hallway
Refinish (2) craigslist side tables
Refinish (2) thrift store/hand-me-down dressers
Create vintage-looking signs for guest bedroom or future nursery
Make another coffee filter wreath for sister-in-law
Create or repurpose letters for kitchen (maybe "EAT")
Sew curtains for guest bedroom and office
Find/buy/make/distress coffee table (This is starting to inch up the priority list....I HATE our current one)


Ok, I'll stop now before I start to have a panic attack.  All of those projects are exciting and I'm looking forward to it, but its also a little overwhelming.  Many of them will not happen immediately, if at all, but at least we have something to keep us focused (and motivated since I just told you all I was going to do it) throughout the year.  Our priorities will definitely be the windows and the roof, since those are necessary for both safety and energy efficiency, but the rest can probably wait until the spring or summer.  I will definitely keep you all posted on our progress and let you know if we have added anything more to the list as the year goes on. 

For now, we are just going to enjoy the end of 2010 and get ready for another exciting new year in our home.  And although this post has gotten me thinking about all sorts of other resolutions and lists (both personal and professional), I will save those musings for another day since I have bored you enough already with this unending diatribe.  Have a happy new year and I will see you all in 2011!!!!

Oh, and before I part with you today, I just wanted to point out two new additions to the list of "Blogs I love" on my sidebar.  Please check out Roasted Beat for a witty repartee on life, great food and reality tv.  My friend RB is charming, honest, witty and a great writer to boot.  Also on the new list of faves is my friend Molly (and B's cousin's wife) who shares her passion for great food on a dime in her blog Cheap Beets!  (Kind of funny that they both use beets (or "beats") as their muse....small world)!!  But seriously, go check them both out.  They are wonderful people but also really great writers with a lot to share!

12.06.2010

If walls could talk...

They would probably tell you what color they are....

But since I am quite forgetful these days, I haven't shared that with you.  And since I have received a few comments and emails regarding wall colors over the last few months, I decided it's about time that I cough up the details. 

Well, without further ado....


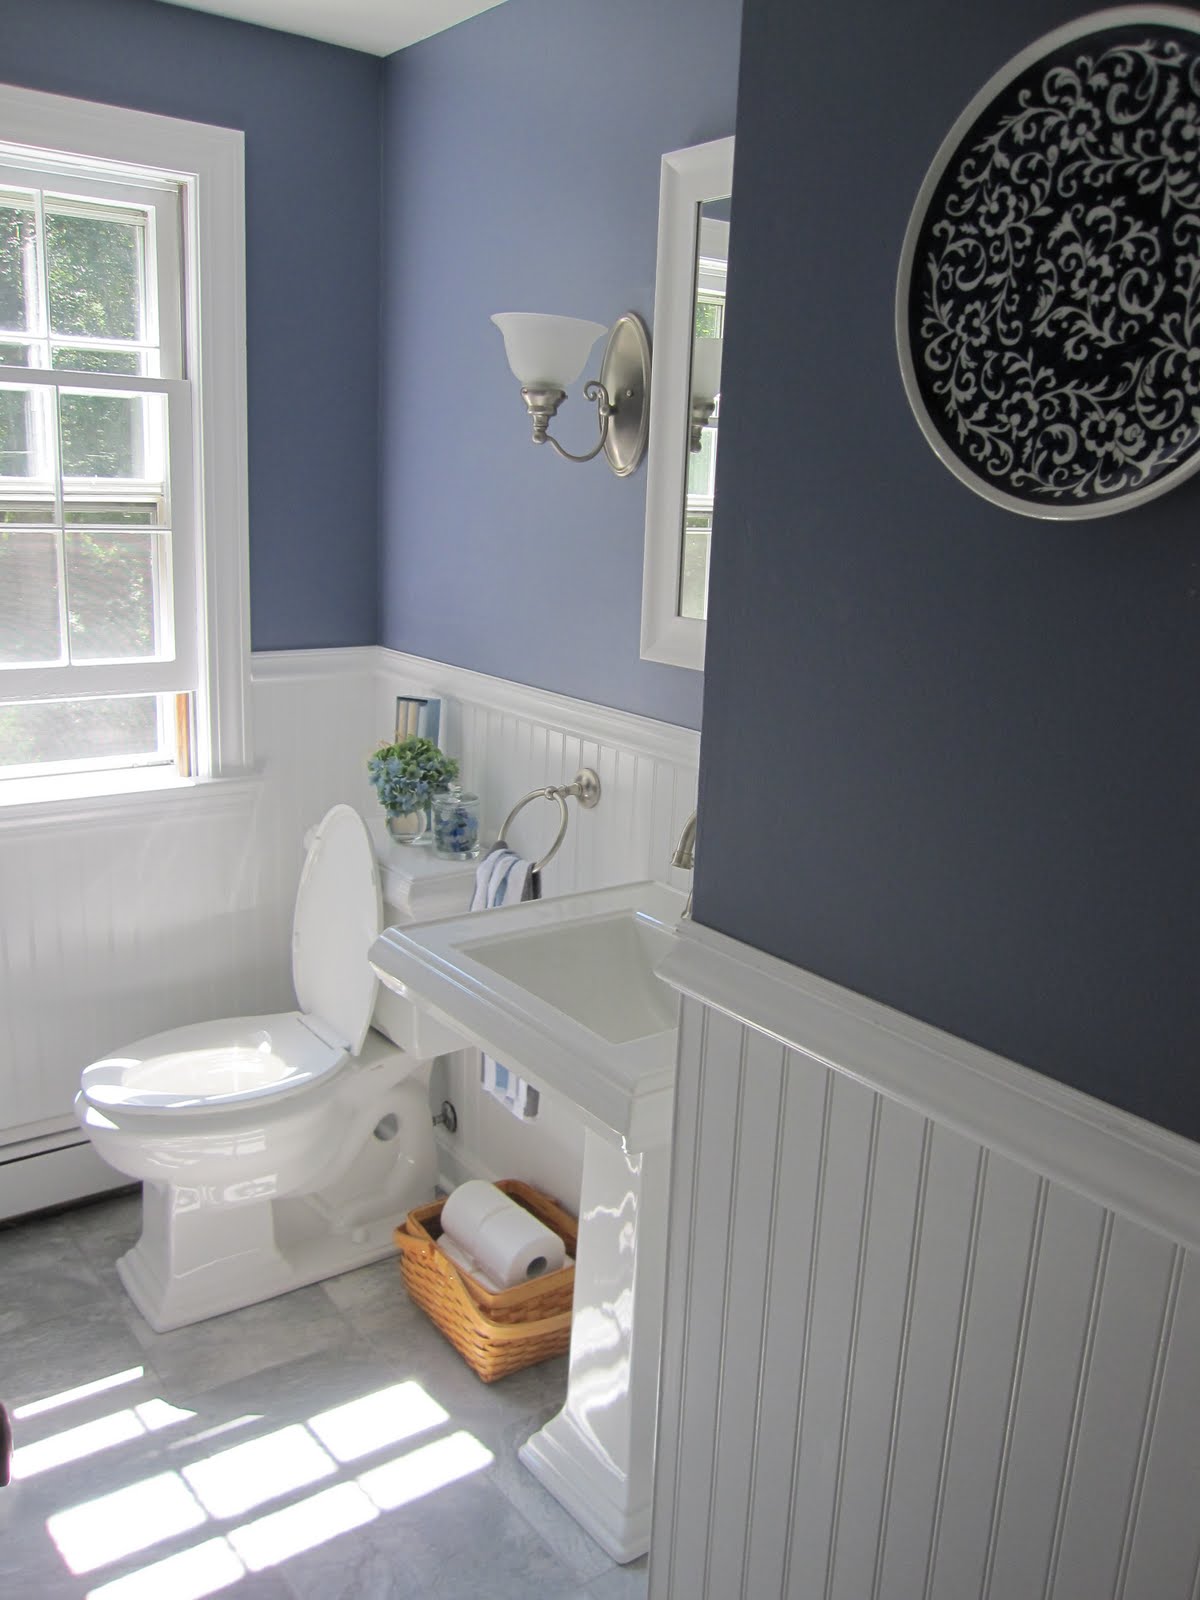
Half Bathroom
Behr Tranquil Pond (Eggshell Finish)

We went with eggshell since this half bath doesn't see any moisture....

____________________________________________________
Kitchen Cabinets
Sherwin Williams SuperPaint Interior Acrylic Latex Paint - Pure White (Semi-Gloss Finish)

We also used CoverStain underneath to prevent the knots from showing through.....
although they are definitely starting to peak through already...but I think its kind of charming
 

 _________________________________________________
Kitchen/Entryway/Hallway
Sherwin Williams ProMax 2000 Paint color-matched to Behr Burnished Metal (Eggshell Finish)
 

___________________________________________________
Living Room
Behr Silver Sage (Eggshell Finish)


__________________________________________________
Guest Bedroom
Martha Stewart low-VOC Lilac (Eggshell Finish)

I should warn you now, this is only a temporary color.  I loved it a lot more on the swatch than I do on my walls. I am definitely a purple fan, but in smaller doses than this. Next in line for the walls is Behr White Truffle (Eggshell Finish again...shocking!!)  It is a creamy beige/tan color.  I love it! But maybe I will do something similar from Sherwin Williams since I love their paint too!!! More details to come.  I have soooo many ideas for this guest bedroom...some furniture redos and maybe even some DIY art!


Are you ready for this, folks??


_______________________________________________________
Dining Room
Behr Down Pour (Eggshell Finish)


________________________________________________________
Master Bedroom
Behr French Silver (Eggshell Finish)


Oh, and before I forget, the trim throughout the house is Behr White (nothing mixed in) in a semi-gloss finish

Hm...I think that's it for now. I could show you the office, but that is changing shortly as well. It is currently Behr - Restful (Eggshell finish) but I am looking for something a little brighter in there once it turns into a nursery.  It definitely works for now though, so I'm going to leave well enough alone....for now at least!


11.23.2010

Deck Reveal

Ok...it's finally here folks.  I braved the jungle that is our backyard this morning and captured a few shots of the deck in its final form (well final until the spring when I plan to stain/seal it)!  I know you have all been waiting with bated breath, so without further ado......[drumroll please].....


I apologize for the dreary photos, but the weather has not been cooperating in the morning and that's the only time I have to take these shots!!  Sorry!! 

We still have some work left to do in the spring, mostly planting around the deck base, staining or sealing (whichever we choose to do), building a planter to go next to the small set of stairs on the extension deck, and re-seeding the grass in the backyard, but I am really happy with the progress so far!!  And I still can't believe that B did all of this (with the help of our dads and friends Liam and Andrew, of course!!!)  I wish summer would come back a little faster so we can enjoy the new deck....but I guess I don't want to make time go by any faster.  It does that just fine on its own!!

So, here is a little recap of where we were and where we have come:


Crazy!  I am so proud of you, B!  Now, if we could just find some affordable patio furniture ("affordable" being the operative word) we would be GOLDEN!  I have been looking for MONTHS though and can't seem to find anything that I like for a decent price.  I have considered both wrought iron (I always type "rod" first and then realize that I am TOTALLY wrong) and teak, but full sets run upwards of $1,000 - $2,000!  EEEK!  I have now become a craigslist patio furniture stalker.  Every morning I check to see if someone wants to get rid of their AWESOME patio furniture and sell it to me for peanuts.  No luck so far, but I'm not giving up just yet! 

So there you have it, our DIY deck project!  What do you think?  Has anyone else out there built or are in the process of building a deck or patio?  I would love to hear your story and see what your plans are for staining or sealing it...or any tips you might have on patio furniture!! 

And I'll be back tomorrow with some thanksgiving-related thoughts!  I can't believe it's already here!!