Showing posts with label DIY. Show all posts

7.16.2012

Kitchen Organization

My counter has always been a dumping station for anything and everything that we have in our hands when we walk in the door....keys, mail, bills, notepads, chargers, etc.  It was getting out of hand and slowly driving me crazy, so I found this little guy at a yard sale recently....


It was only $2, so naturally I grabbed it and held on for dear life while glaring at everyone else browsing (even though they were no where near this table....or even interested in this particular item).  You can never be too careful.


I brought him home and checked my shelves for some leftover spray paint.  These two cans were it, so I put them to good use....after a quick sand to rough up the surface for better adhesion.


I'd say it took about 4 coats in all.  I tried to do very light ones, so it might have been more than I usually do, I just didn't want to get any drip marks.  I normally like to use heirloom white, since its a little warmer, but this will do for now.  I have been on the lookout for it at the Home Depot near me, but they have been out of it for months now.  Until then...here she is.  Being all organizational.


It has really helped to organize stuff on my counter.  I won't go as far as to say that it has eliminated all the clutter, but it definitely helps.  And even B has started putting things in there when he gets home from work.  SCORE!!

So for $2 I feel like a more sane housewife....for the time being.  My next project for that space is to hide the phone cord that hangs down from the shelf.  I bought this white plastic tube-like thing to do it, I just need to figure out how I'm going to stick it to the wall.  I'm hoping I can find something that is removable.  Maybe velcro, or that 3M stuff.  I'll report back.

For now, I'll just enjoy my organized kitchen.

Hope you all had a great 4th!  We were away for the week and are just now getting back on a normal schedule.  The heat is CRAZY though.  Our two window-unit AC's have been running around the clock.  Can't wait to see our electric bill.  EEK!

Stay cool. 

6.28.2012

Gallery #2

Since I was on a roll with the gallery in the basement, I thought I would just continue the madness upstairs in our hallway.  I bought frames for this project almost a year ago and just didn't get around to completing the project until now.  For some reason I was intimidated by it all....where would I hang them, what would I put in them....etc.etc.  Enough intimidation to make me put off action for 12 months.  Crazy!!   Plus, it is upstairs.  No one but me and B really see that space, so that also factored into my hesitation.  But....I was inspired by how easy it was to put up the frames in the basement, so I just up and printed a bunch of photos, laid out the newspaper cutouts on the wall (after measuring and moving them around 15 times) and hung them all up.

Here is what the hallway looked like when we moved in....


I have a lot of things to say about this photo, but my mother always told me that if you have nothing nice to say than don't say anything at all.   So....moving on.

First, we ripped up the carpet and (phew) there was hardwood underneath.  We refinished it and stained it darker (along with the rest of the floors in the house) a red mahogany color.  We hired someone to do that work since it was the whole house and not one room.  But we decided to refinish/stain the banisters and replace/paint the spindles ourselves.  That was not an easy project, but I think it is totally worth it.  It really brightens and cleans up the whole space.

Here it is after a little paint and stain.....and a new light fixture....


And also in the process of updating this area, we decided to paint the doors black.  B was gung-ho (sp?) about this but I have to admit being a little skeptical.  The whole plan for this house was to clean and brighten everything....and black felt like it would create the opposite effect.  But, after a few weeks of listening to his rationale and obsessively googling for pictures of black doors on the internet, I decided to jump on board.  And I have to admit (although I hate to) that I really love it.  For more info about this process, check out my post here from 2010).

This is what the hallway has looked like since August of 2010.  It is 100 times better than it was when we moved in, but it was still pretty bare....until now.


The only tricky part about this project was working around the thermostat.  Otherwise, I just started out with a straight line in the center and worked up and down from there.  I scattered the basement gallery a bit more randomly (more on that here), so I thought I would try something different upstairs.   I bought all of these frames at Michaels on sale a year ago.  I think I got this whole slew of frames for around $100 since there was a 50% off promotion plus a 20% off extra coupon (or something like that).  That is less than $10 a frame, so it was a steal!!  The rug was from IKEA a little while back.  Not sure if they still have it, but I have three of them throughout the house.  One in the hallway downstairs and another in the kitchen in front of the sink.  They were $15 each and they have been AMAZING!  I think they still have the same type of rugs available, just not the same colors.  The biggest reason I love them is because they are machine washable and they come out looking brand new.  Perfect for kids!!!

And I almost forgot to mention the horse painting.  This is my favorite new addition to the hallway.  B bought this for me for my first mother's day.  I have been talking about a horse painting ever since I met him and he finally found one for me.  It is so nice to look at it every morning when I wake up to head downstairs.......even if it is 5:00am.

So that's it for galleries this week.  I am thinking about doing a little three frame thing in the downstairs hallway, but only if I can get another good deal on frames.  There isn't anything on the wall at the moment, so it looks a little bare.  Just not sure what to put in the frames yet so I am holding out on the project until then.  Upstairs was easy, I just found a picture for every place we have traveled.....plus a picture of my belly when I was pregnant (of course).  It is sort of a random assortment of photographs, but I thought it seemed relatively cohesive since they are all black and white. 

The beauty of a project like this is that you can always remove and replace the photos down the road if you have a change of mood or decor.  And knowing me, that will be sooner rather than later.  Or, in keeping with the timeline of this project, maybe I will take another year to plan it out!  Who knows??

Have you done any galleries in your home recently?  I am obviously loving them lately since I have done two in a matter of a few days.  If so, I would love to see what you are working on....

And before I leave you, let's do a quick before and after.


Before
After

6.21.2012

Yard Sale Table: Trash to Treasure

I mentioned last week (here) that I found a table at a yard sale down the street.  I had been looking for a pedestal-style table for the kitchen/mudroom area ever since we renovated the kitchen (more on that here, here and here).  It certainly wasn't for lack of options that we were left table-less.....I just didn't want to pay $500 or more for it.

Here are some of the ones I have been eyeing over the last two years...


Ballard Designs - Augusta Dining Table ($499)


Pottery Barn - Sumner Pedestal Table  ($1499)


West Elm - Arc Base Pedestal Table ($499)

I also saw a few here and there on craigslist, but they were always snatched up before I could get them....or they were more than I wanted to pay, which was $100.

So I put it on the backburner for a while and decided that it would happen when I least expected it.  And it did.  As I was driving to the grocery store the other day, I passed by a yard sale down the street and lo and behold, my table was waiting for me....and for only $75!!! 


I apologize for the slew of before pictures.  The table was disassembled when I bought it so in my laziness eagerness to get started, I didn't put it together for a good before shot.  As you can see though, it was in pretty decent shape, just a few water marks and scratches.  And since I was planning to paint it white to match the cabinets anyway, it wasn't a big deal that I had to sand down the minor defects.  I used 100 grit sandpaper (which I had on hand) and went over the surface a few times to remove the poly coating and smooth it out.  Then I rubbed it down with some tack cloth and started to paint! 


I used Zinsser Bulls Eye 1-2-3 Plus Primer for the first two coats.  I already had this can (as you can see by the paint drips all over it) from a project in the basement, so I didn't need to run out and buy something special for this project.  I have used it a few times in the past, and it works really well to seal in stains or wood knots.

I gave it another quick sand after the prime to make sure there were no bumps or bubbles and then applied one coat of Sherwin Williams Super Paint in Pure White.  This is the paint that we used to redo the cabinets in the kitchen, so I wanted to be consistent.

And here she is....


The legs are definitely not as shapely or fancy as the PB or Ballard Designs tables, but I think it works for the space....and for a lot less money!  It also came with two leaves, so I refinished those as well in case we have a party and need a buffet-type table.  And since I had the sandpaper and primer and paint on hand already, the whole table transformation only cost $75.

Here is a look at the before and after:


I shoved a few chairs that I already had at the desk area in the kitchen underneath the table but they are a bit too tall.  I am thinking about trying to cut them down a little so that I don't have to buy new ones, I'm just nervous that they won't be as sturdy if I do that.  Has anyone had experience shaving chair legs?  :)


I am also on the hunt for a pendant light to hang down (p.s., so glad we left the electrical up there when we added recessed lighting) over the table and some placemats or a cute runner).  And even though the bench seat looks relatively put together in these photos, I just wrapped a piece of fabric around foam and stuck it there for the time being.  There is some sewing to be done around here soon!  Maybe that is my project for next week.  I am trying to do one project a week (whether it be changing photos in frames or re-painting something), which feels like a reasonable goal to me.  And usually if I set that goal, I am able to get way more done.  It's when I expect to accomplish five projects in a week that I end up disappointing myself.  Reasonable expectations......

Oh, and you might have noticed in the shots above that I changed the photo in the frame on the shelf.  I took some 9-10 month shots of Pace the other day and this is my favorite.


And here are a few more since I can't resist....


Linking up to Lil' Luna and Sew Much Ado

6.15.2012

Deck Chair Rehab

Instead of focusing all my attention on tiling the shower in the basement, I decided to use a naptime this week to update our worn out adirondack chair.  I bought this baby last year at a yard sale for $15.  She was in pretty good shape then, but we left her out all winter (oops!), so she got a little beat up.

Here is what she looked like earlier this week....


Not too bad, but she needed a little love.  A little Krylon love to be specific....

I lightly sanded the whole chair with some 100 grit sandpaper that I had on hand to get off any loose paint and rough up the surface a bit before priming.  Then I wiped it all down with a tack cloth to make sure to remove all the debris.  Then I applied 2 light and even coats of primer (I waited about 30 minutes between each coat) and then two light and even coats of Oxford Blue Krylon Paint (an hour between coats for this) and this is what I got....


The color is probably truest in the first close-up photo.  It is a little lighter than a navy.  I think I bought the spray paint at Walmart for $3 something a can and I had the spray primer leftover on my shelf from an old project.  I love cheap transformations!  I think this chair is going to last us a long time.  Maybe even longer if we bring it in the garage next winter.

Still working on a few more little projects for the deck, which is why I didn't include a full shot of it.....more to come next week!!

Oh, and I found something else at a yard sale this past weekend......


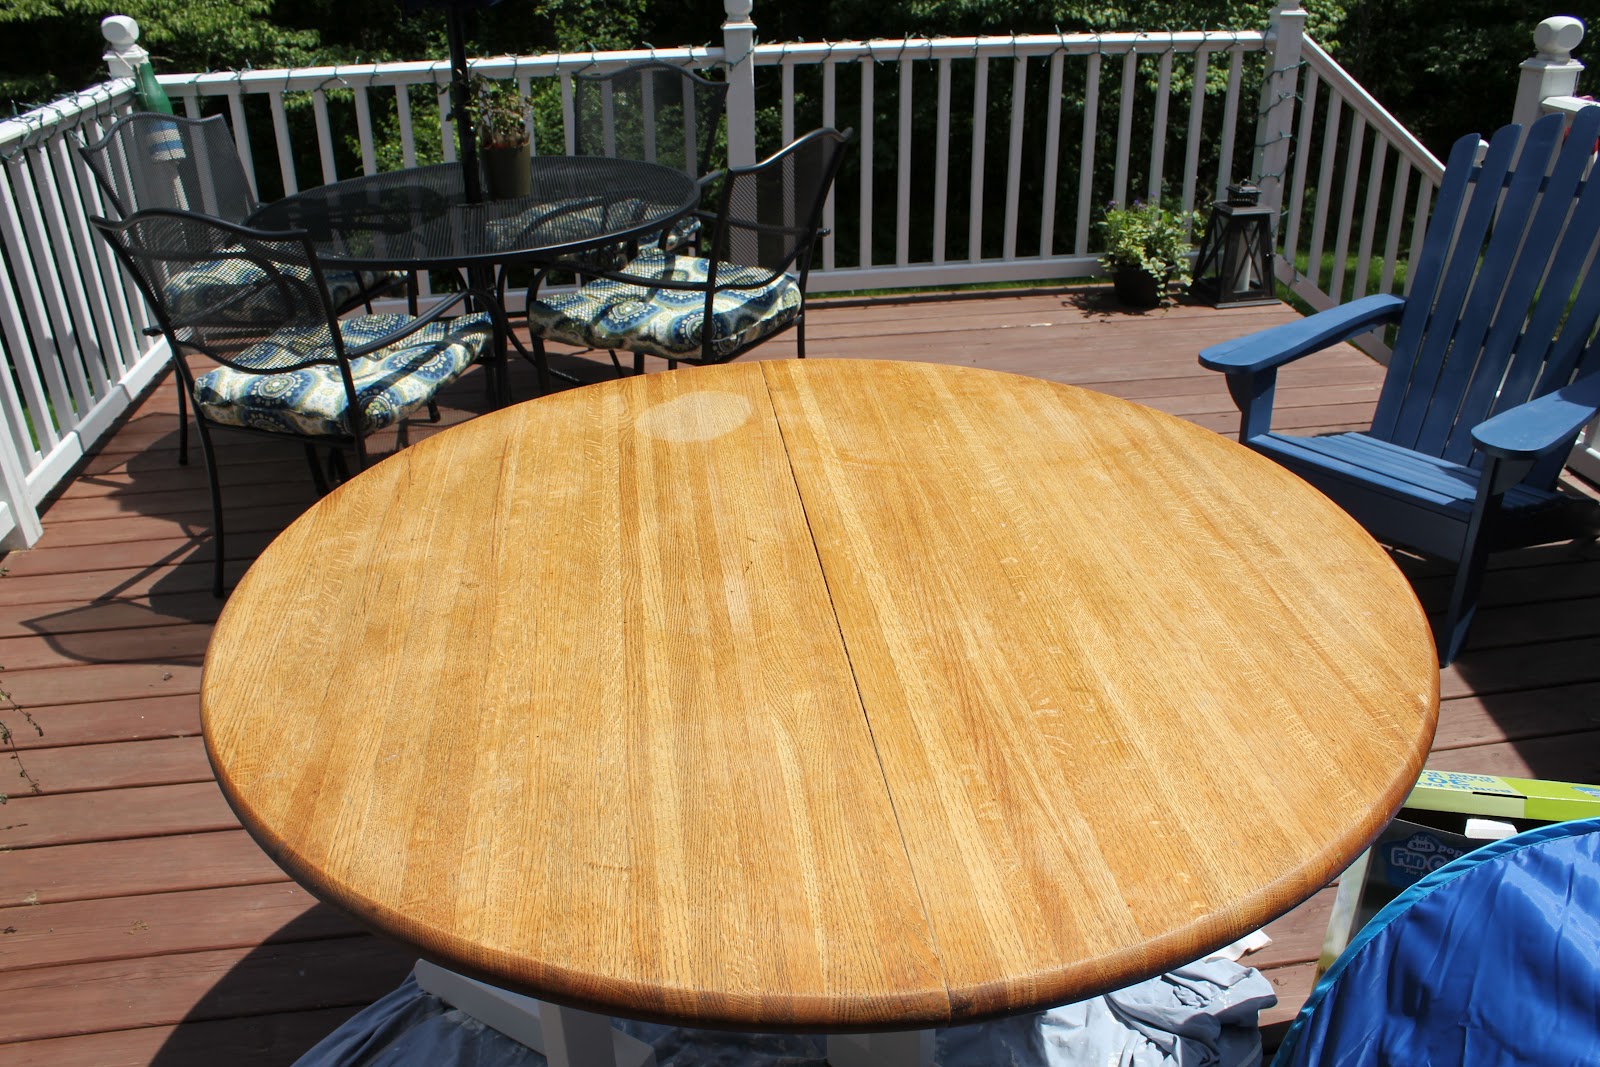
It came with two leaves as well, but I think I'm just going to use it as a small round table in the kitchen/mudroom area and save the leaves for a party or something down the road.  As you can see, I already have my paint out and ready to go.......hopefully I can finish it up today or tomorrow and show you some pictures.  YAY!!  Can't wait.  I've been looking for a table for that space for about a year now......

More to come soon!