Showing posts with label Bathrooms. Show all posts

6.05.2012

The Great Wall of China

Tile is sort of like china, right?  I'd certainly rather eat off it than lay it, but that is neither here nor there.  And it may be getting a little too Fifty Shades for this family-friendly blog.  I am so tired of tiling, I can't even tell you.  I made some progress this weekend, but it still feels like it's the never-ending story.  You probably feel that way too.  Enough with the progress reports, Heather, let's see the finished product!!  I know!  I am sick of hearing myself talk about it too, so I feel your pain.

But we are getting there.  And I'm happy with how it's turning out, so I guess that is saying something.  I just keep chanting, "you are saving money, you are saving money" and that gets me through.....the first five minutes or so.  After that, I just wallow in self-pity until I get a few more rows done so I can feel like I have accomplished something that day.  I made a good dent in the wall on Sunday though, so the end is in sight.  Here is where I left off last week.


And here is the progress I made the other day.


I was hesitant about the mosaic, but I think it breaks up the monotony of the subway tile a little bit.  They came in sheets of 18x18, so I just cut them in half to make it a little less overwhelming.  B loves it (it was his idea originally), but I am still on the fence.  I like the tile on its own, I'm just not sure about it on the wall.  I mean, it's a little too late to do much about it at this point, but that will never stop me from complaining forming an opinion about it.  Just ask B....it's his favorite trait of mine.  Probably the very reason he married me.  :)

But it's coming along and I'm really happy with it overall.  One whole wall is done and I just need to finish up a few more rows on the second wall.  Almost halfway there!!!  Only trouble is, I left the hardest part for last.  Not the best strategy in home improvement.....or life, for that matter.  There is a big hill near my house and I made the mistake of ending there the first time I went for a run.....huffing and puffing my way up it when I was already exhausted (which was about 7 minutes into the workout).  The next day, I started on the hill and ended on a descent and though I probably didn't get the same workout, I made it all the way home without stopping.....and got faster and faster as time went on.  I am not against challenging myself, but it made so much more sense to test my limits when my legs were fresh, rather than strain them when they were weak.  I'm sure personal trainers are gasping at my advice, but it worked for me.  And I really should have applied that theory to my tiling project.  If I had started on the tough spot, I would be smooth sailing at this point.  But I forgot about my running episode and just dove right in without a plan.  Next time.....I'll do it right.  That is, if there ever is a next time.  I am all tiled out at this point.  I need some time away from the tile saw.  And I'm sure it is feeling the same way after I shook it in frustration at the end of the day on Sunday.  Maybe a trial separation.  We'll see how he feels in a few months....when we are thinking about re-doing the upstairs bathroom.  Gasp!  Dun dun dun.....

To be continued.......more progress updates (or maybe just a final show and tell) next week!

5.31.2012

T(o)iling Away!

Here is what I've been up to the last few weekends....


Slowly but surely, I am finishing up this bathroom.  Any extra time that I've had over the last two weeks, I have dedicated to this shower.  An hour here, two hours there.  Luckily it is pretty easy to set up and take down this kind of project, since my tools consist of a bucket of thinset mortar and a trowel (and the tile saw every few rows or so), but I really need a solid 8-10 hours to really put a dent in it.  It is relatively easy work once I got started.....but it is painstakingly tedious.  The planning and measuring was really the hardest part.  I think I mentioned in my last post about the bathroom (here), that the shower floor has a slow gradiant to allow for the water to flow to the drain.  Because of that, and since I wanted the subway tiles to be perfectly level, I had to draw out a start line along the bottom edge to make sure that the first full set of tiles would line up perfectly all the way around the three sides of the shower wall.  To rectify the small gap that was caused by this, I am going to use thin pieces of subway tile in the brick pattern underneath that first full row to fill in the space.  You can see these strips have been cut and placed in the last photo above.  Once it is all grouted and finished, you will not notice that at all.....hopefully! 

I considered just starting the rows of subway tile right on top of the rock floor, but that would have made it difficult to match them up around the edges....and would have made the rows a little angled here and there as well.  EEK!  Not acceptable.  I am a perfectionist (if you haven't already noticed), and it would have bothered me more to have two subway tiles not meet in a corner than to have a few thin pieces along the bottom.  I am looking at those pieces as a sort of molding or trim anyway.  That makes it seem a little more deliberate.....or at least I'm telling myself that.  And in the end I think it will look nice when all of the sides match up.  It will be more of a continuous look for your eye to follow. 

The threshold was the next hardest part of this project, but only in terms of the cutting.  We found an 10' x 5' piece of carrera marble at Lowe's and cut it down to size with our small tile saw.  The blade could handle it, it was really just guiding the heavy piece through that took a lot of time.....and strength!  But after a few minutes of sweating and praying that it wouldn't crack from the pressure, we had a custom-fit piece of marble to attach on.  We cut it a little wider (or deeper, depending on how you are looking at it) to allow for a small lip on the outside edge.  I thought it looked a little cleaner that way.  In the shower, it meets up perfectly with a bullnose tile (to be shown in the next post). 

So that's where we are in the whole basement renovation process.  It is coming along, just not as fast as I would like.  My parents are coming up this weekend to help out, so hopefully I can get a full day of tiling in and see how far that gets me.  I'm getting nervous around the left-side of the shower where there is a little jut out in the wall, though.  As you can see in the photos, I have been avoiding it so far.  I'm thinking that I will use some bullnose tile to make the corner a little smoother, but we will see how it all looks.  I will post about that next week!

Oh, and I hope everyone had a great Memorial Day weekend!!!  We went up to Bar Harbor to visit my in-laws and it was peaceful.  I know that's sort of a boring way of describing a trip, but they live pretty far off-the-beaten-path.  Hm....that doesn't quite describe it.  Let's just say, when you think you've driven to the edge of the earth, its another 40 more miles......yea, that far....so it was really quiet and relaxing once we finally got there.  I actually had a pretty nasty head cold, so I slept on and off most of the time and read my book on the deck while everyone else took turns watching Pace.  Even though I didn't feel great, it was nice to be off-duty for a little bit.  And it's always fun to watch other people chase after him (since he's crawling and table-walking.....or rather, wobbling from one piece of furniture (or leg) to the next while trying to hold a toy in both hands...haha) and then look at me and say "I don't know how you do it".  I realize that my job isn't as intellectually stimulating as it used to be, but it is 10x more draining and physically demanding than it ever was.  To all of those people that asked me "what are you going to do with all your time" when I first decided to stay home, I am currently accepting babysitter applications.  He's all yours!  :)


He is truly at an amazing age though.  He discovers something new every day and its wonderful to watch.  I am definitely exhausted, but its worth it.....every minute! 


5.10.2012

Sticks and Stones....

....were installed in our shower.  Ok, maybe just stones, but that was the first saying that came to mind.  So I went with it. 

I have been procrastinating this project for who knows how long, and last weekend I finally decided to check it off my list.  We went with a product called river rocks that are available at Home Depot.  They come in 12 x 12 in. mesh-backed pieces and you just place them side-by-side to get a cohesive look. 

Here is what they look like all laid out:


I placed them from the drain in the tub outward to get an idea of where I needed to cut.  The best part about the mesh backing is that there is no need for a tile saw.  I just used the scissors to make each piece fit perfectly.  Once I had it all laid out, I transferred the whole layout from the tub to the bathroom floor so that I would remember which pieces fit where. 


Then I just spread out the tile adhesive, OmniGrip (available at Home Depot), as evenly as possible across the whole floor.  The contractor who installed the shower drain for us put a layer of concrete in the shower stall to level it out and make sure there was a bit of a gradient towards the drain.  So my job was really to just keep the tile adhesive as even as possible to allow for that gradient to remain.  And in doing so, the tiles came up evenly with the drain.  If they were too far under, water would pool around rather than travel into the drain.  And if they were too high (because of too much adhesive), then the water would have to travel up to get into the drain.....not likely.  Surprisingly, it worked out and everything was even. 

Here are some process shots:


My trusty sidekick (Dad) helped me lay them all out and figure out which pieces could fit where.  It was almost like doing a puzzle.  I had to individually place a few stones here and there around the perimeter, but for the most part, it was a quick process.   Oh, and please excuse my outdated outfit.  I still like to feel like a bride-to-be every once in a while.  Haha.  This poor sweatshirt has seen almost every home improvement project we've done.  It's been through a lot!

So, after waiting 24 hours for the adhesive to dry, I grouted over the tiles.  I went with DeLaurean Grey (like Back to the Future..awesome, I know).  I used the same color on the backsplash, the half bath redo and the basement bathroom floor and loved it, so I figured I'd stick with what works.  Plus, I had some leftover....and I hate to waste! 

Here is the grout going in:


 Yes, it is the next day and I'm wearing pretty much the same outfit.  Different pants (and underwear, of course), but the same sweatshirt.  It's almost like I'm superstitious about it....if I don't wear it, then it won't come out as good.  Who knows.  I'm just a little crazy after all of this renovation.  My process for grouting was just to spread it evenly across all the tiles, making sure it filled in all the gaps between rocks.  Then once it dried a bit, maybe 20-30 minutes, I would take a clean sponge and wipe off the excess from the stones.  It took a few passes, but they came clean eventually and left me with this:


Sorry for the small pictures.  My cameras are both charging, so I took this with my iphone and it didn't come out great.  EEK!  Better pictures to come when there is more progress.  I had to buy a new blade for the tile saw since it had become dull after so much use.  I plan to get started on putting up the subway tile this weekend.  Yes, I know its mother's day, but I just want to finish it.  This basement project has gone on long enough!! 

But until then, I have a little sneak peek at an addition to the basement that arrived this week......


Can't wait to tell you more about it! 

 Before I go, I'll just do a quick before and after. 


3.16.2012

And then there were floors...

I know I used that line already (here) for Pace's arrival, but it seems to fit pretty well here too so I apologize for my unoriginality.  :) I know that people talk about "pregnancy brain" but I'm pretty sure that I still have it (or rather DON'T have it) seven months later.  Kind of like my body...haha.

Back to the floors though.  Pergo floors to be exact.  I have to tell you about the deal I got because I almost don't believe it myself.  As usual, I went back and forth (literally from store to store and website to website) deciding on the laminate.  One day I made a random trip to Lowe's to pick up an exterior light and I did a little drive by the flooring section when I came across a yellow tag on the bottom shelf.  I'm not sure if you are all aware of the yellow tag, but it usually means an AMAZING deal.  I initially assumed it was not what I was looking for (color-wise or style-wise) but to my surprise, it was pretty normal.  It was called Classic Red Oak by Pergo and it was on sale for $1.19/sq. ft. from $2.99/sq. ft.  CRAZY, right??  I would direct you up to the Lowe's website to show you what I mean, but the reason it was such a good deal is because they were on buy-back from Pergo.  I guess they were changing out the color or the name of the color or something (which they do on occasion when something isn't selling as much) so Lowe's was getting rid of them for cheap.  Real cheap.  I couldn't pass up the deal, so I bought every single one on the shelf....in 4 different stores.  I ended up having more than I needed, but I'm going to save a box or two in case we damage a piece later and they are no longer manufactured.  So all in all, we spent $556 on 520 sq. ft. of laminate (or $618 - $62.88 with a 10% coupon I had).  I thought that I just loved it for the price, but once we started installing it, I think that I like it regardless.....


And I liked it even more once the whole thing was complete!! (Please forgive the terrible, cluttered, messy photos....we haven't exactly cleaned up and put everything back in order yet, so these are just a sneak peek at the finished product)!


And for the bathroom floor, we chose the same tile as we used in our half bath renovation (more here).  It was $4.00/sq. ft. which came out to $182 ($168 for 42 sq. ft. plus $14 for grout).  I already had the tools and the thinset mortar from the kitchen backsplash project (here and here).  I apologize for the terrible process picture.  I meant to take more as we were working, but once we got started I got in a groove and didn't want to stop.....mostly for fear that I wouldn't start back up again.  Oh, and yes, I am wearing a sweatshirt that says "The Future Mrs. Carroll".  Haha.  Hell yea I still rock my pre-wedding digs.....to paint and tile and do messy things.  Sorry honey.  It's kind of weird to wear them anywhere else at this point (3.5 years later) so instead of wasting a perfectly good hoodie, I decided to put it to good use.......


Oh, and I also threw in a look at the shower floor tile.  It is only laid out at this point so I can see how many more 12x12 sheets I need.  What do you think?? 

And just because I have to throw in a picture of the little bug.....
 

We are so close to finishing this project, I can taste it!!  We even had time to install the doors and some trim so I will have more updates very soon!

6.09.2011

Our Little Hole in the Wall.....literally

As I mentioned in this babymoon post a few weeks ago, the soap dish tile in our bathtub fell out the other day and smashed into about 40 pieces when it hit the floor.  Ugh!  We were disappointed, and a little dumbfounded, to say the least, but we weren't necessarily surprised.  The tile work was original to the house, so we are talking about almost 50 years of wear and tear on that grout and caulking (which hopefully explains the amount of dirt and grim that you will witness in the following photo.....I SWEAR that I've tried to clean it)!!


Lovely, right?  If you are wondering what the weird film is over the hole, oh that's just some saran wrap and packing tape.  Haha.  It was the first thing that came to mind when we needed to take our next shower.  I used all of my girl scouts knowledge from eons ago and came up with this combination.  Not pretty, but it worked for the time being, especially since a full bathroom renovation just isn't in the budget right now.  And we certainly couldn't leave the hole exposed, since it went right through to our bedroom wall and the moisture from the shower would get in there and eventually create mold and mildew......EW!  So, off to Home Depot we went. 


And we returned with this beauty!  For $6.98, it was the quickest fix I could think of until we have the money to renovate the whole bathroom.  It was the only size available, and of course they didn't have the lovely blue version in stock at the time (haha....I'm actually pretty sure they haven't manufactured the blue tile version for about 30 years now).  But since it was a temporary fix, we thought that white would work just fine. 

The only problem was that the new soap dish was a weeeee bit bigger than the existing hole....of course!  But not to fear, my genius husband picked up a $3.47 grinding point at Home Depot in case something like this happened (since I NEVER would have thought of that).  The grinding point just attaches to your drill and the rest is history. 


It took him about 5-10 minutes of grinding to get a perfect fit.....and we only had one minor setback during that process.  While he was testing out the fit, he turned around to get my attention and let go of it.....which made is crash down into the tub (a la the blue soap dish of yore) and the edge chipped off.  Oops!!!  We considered going back out to HD to pick up another one, but after playing the "not it" game for a few minutes we realized that the chip wasn't going to affect the integrity of the soap dish, so we would just patch it with some quickset mortar and call it a day.  Normally I am all for perfection, but since we know that we are going to renovate down the road, it just didn't make sense to run out for another $6.98 soap dish that we wouldn't use forever. 

Unfortunately I didn't take step-by-step pictures of the grouting and caulking process, but it was a pretty quick process.  We already had some quickset on hand from the backsplash project  back in the fall, so we used that and put a healthy dose of it on the back of the soapdish and held it in place while it set for about 10-15 minutes.  At that point, we let it fully set on its own for about 5-6 hours and used caulking to seal the edges around the existing tile.  I believe it was just DAP waterproof stuff in white. 

Here's B holding the tile in place.  I think he had envisioned us taking turns
holding the soap dish in place while it set a little.....but I preferred to document
the process while he SUFFERED!!  Hehe

Please try to ignore the DISGUSTING grime that lives in the grout of my shower. 
As much as we try to scrub it, it just doesn't get any cleaner. 
And now that we know that some of the tiles can just spontaneously fall off,
I'm going to scrub a little softer so as to not encourage anymore from jumping ship.....
Oh, and you can totally see the outline of the chip in this close-up shot. 
Does it bother me?  Yes, but do I care enough to re-do the entire project.....HELL NO!!

From far away, the grout lines don't look as bad...but you now know the truth!!  EEK! 

So that's it for our quick bathtub soap dish fix!  And for $10.50, it was by far the cheapest and most painless patch job that we've encountered as new homeowners.  If only they were all like this!!  Have any of you done a project like this before in your bathroom?  Or any quick fixes before a full renovation?  I would love to hear about it.

1.21.2011

House Crashing: The Aftermath

So I lied about having the photos up yesterday....I apologize.  Work has been crazy and I just didn't have a chance to upload the photos to my computer.  But fear not, I got around to it last night and can't wait to share them with you.  For those of you just joining in, here's a quick recap: B and I flew out to Chicago this past weekend to help our friends with their bathroom and kitchen DIY projects.  The bathroom was a full demo (everything but the bathtub), but the kitchen was just a small update (adding a backsplash).  You can read more about the trip here and here

So here is where we started last week:

Bathroom


Kitchen


Neither room started off that badly.  Trust me, I've seen a lot worse in my own house.....actually, I'm not sure I've even shown you guys my upstairs bathroom......well, there's definitely a reason for that.  Back to their house though, we weren't dealing with a total disaster here, they were just looking to update the bathroom with a new and more functional vanity, wainscotting along the walls, a new tile floor, a medicine cabinet in front of the vanity rather than on the wall behind it (as seen in the first photo shown earlier), and to patch the hole from the existing medicine cabinet.  They also purchased new hardware to tie everything together.  As far as the kitchen went, it was already updated with stainless steel and nice cherry cabinets, but they were looking for something more.  And a backsplash was just the solution.  We checked out a lot of different tiles and ended up going with a glass tile mosaic.  I had never worked with that before, so it was a first for both of us.  For all of my DIY tile projects (read more about them here, here and here) I used thinset and mixed my own grout, but since we were dealing with such a small space here, we decided to try a simplemat tile setting mat (see below).  I have read about them in numerous DIY blogs over the years but never tried it myself...until now.


And I have to say that it was DEFINITELY a lot faster and cleaner than using thinset mortar.  No mess to clean up after and you don't have to wait to grout.  The only downside was that it is VERY sticky so you have to be careful that you lay the 12x12 mosaic sheets (or whatever tile you are using) right the first time or it is a pain to try to peel back off and re-lay it.  Overall though, I would highly recommend the product though for a quick and easy DIY project.  We were honestly done laying the tile in about 40 minutes. 

Here are a few photos during the tiling process:


LP picked up the tiling process really quickly, so she ended up doing most of it while I just "supervised."  She did a great job!!  12x12 mosaic sheets are so easy to use too that it made the whole process that much easier.  If we needed to cut around an outlet or corner, we could usually just cut the mesh backing as needed and continue on our merry way.  We actually only needed to cut (with a wet saw) 5-6 individual tiles around the edges of the outlet.  We really lucked out with the spacing!  And speaking of spacing, the 12x12 sheets are also great because they come on the mesh backing already spaced, so you don't need individual spacers for this project.  Another step eliminated!!! 

The last step, and probably the most tiresome was the grouting.  With the way the schedule fell this weekend, we didn't have time to do the grouting before we left, so LP tackled this on her own Tuesday and Wednesday.  It was tedious but it came out really nice.  Here is the final before and after:


All in all, this was a really simple update that made a big impact on the look and feel of the kitchen.  It seems a lot more finished now, don't you think???

Well, now I guess I should get on with the big renovation of the weekend.  You are probably holding your breaths waiting for this reveal, so without further ado.....here are some shots taken throughout the weekend so you can see the progress.....

Here, you can see here that the floor and the mirrors/medicine cabinet has been removed and we have started patching the holes and putting up the wainscotting.....

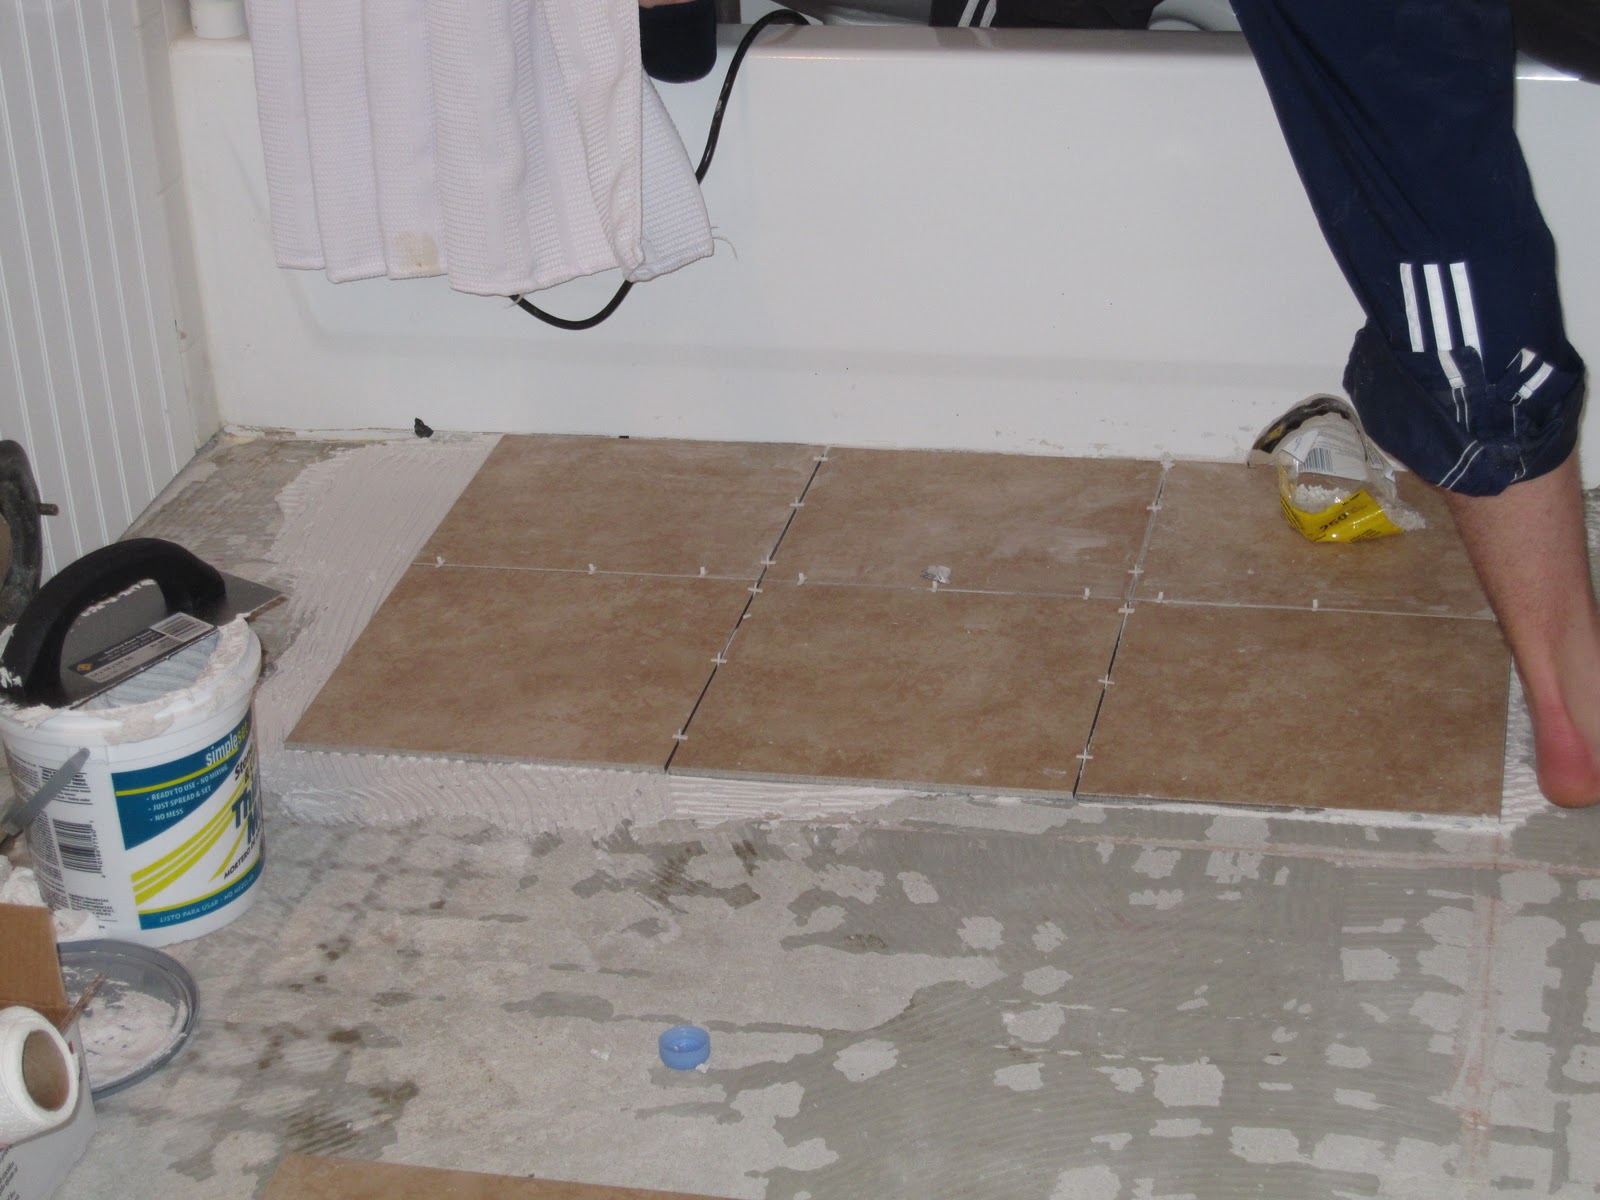
We laid out all of the tiles first to see what the best configuration was (i.e., least amount of tile cuts)
and then started laying from the tub back out.  This is important so you don't tile yourself into the
tub/corner of the room!!!

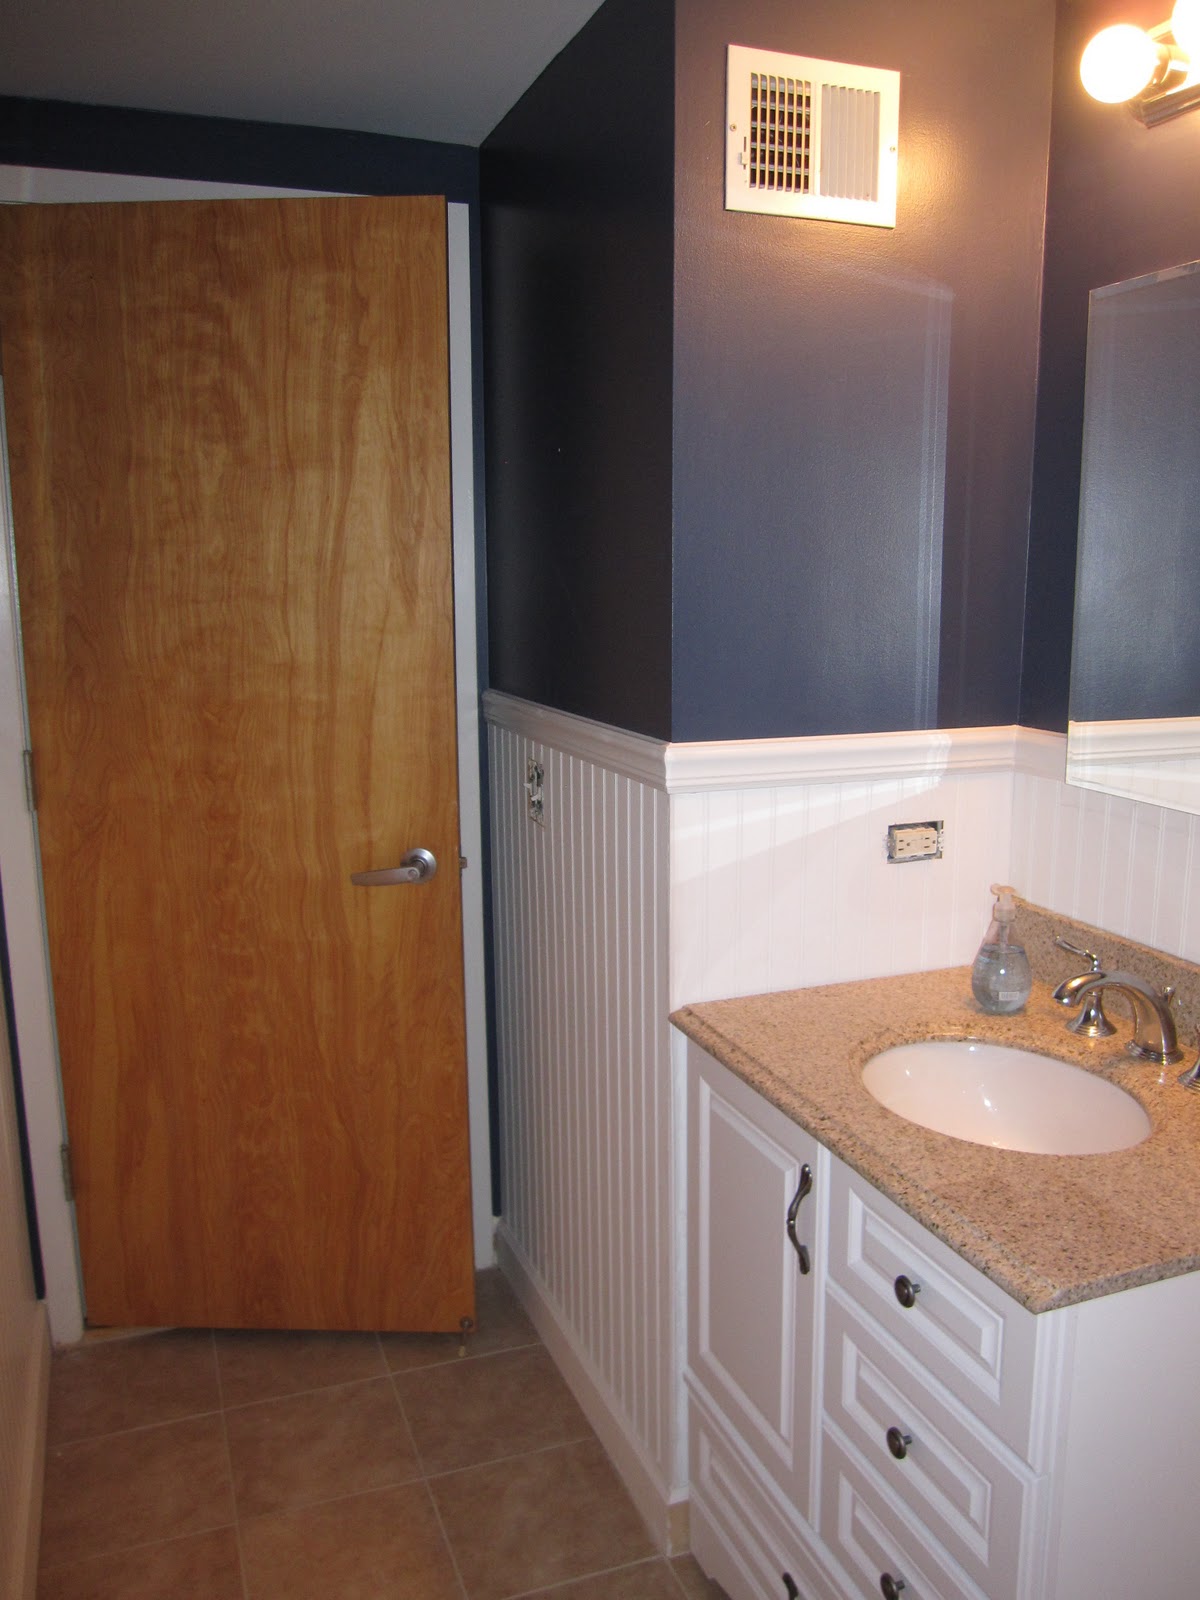
Before grouting, we were able to put up the rest of the wainscotting around the room.  Next, we grouted the floor and wiped off all the excess once it had dried a little.  The final steps after that were just to install the rest of the molding and the fixtures.  As you may be able to see in the pictures, the toilet was hanging out in the tub until we could re-install it.  That made it so we didn't have to carry it all the way outside (since we were working in a condo unit).  The vanity was new, so we just had to anchor that into the wall and then attach the granite top to it using some silicone caulking.  We purchased the granite top with the sink already undermounted to it, so that saved us a step as well.  I highly recommend this to anyone considering a DIY bathroom renovation in the future!!  And finally, we did all of the finish work (filling in holes with wood filler or paintable DAP caulking, installing the faucet and other fixtures and painting the wainscotting and touch-up areas on the blue wall. VOILA!!!

Here is the before and after:


So there it is folks.  It doesn't seem that a dramatic update in these photos for some reason, but it made a world of different in their bathroom.  Not only is it more functional with the new vanity and the re-placement of the medicine cabinet, but it is also a lot brighter and cleaner looking than it was before.  The small white tiles on the floor were dirty and cracking, not to mention outdated, so the larger 12" tiles really helped to clean it up and make it more finished. 

And I know what you are thinking.....do I only use blue paint and white wainscotting in bathrooms...haha!  They actually already had the blue paint (Benjamin Moore - Newburyport Blue) on their walls before we started this project and they just happened to want the white wainscotting as well.  Maybe its a New England thing (since they are from here)......who knows?  What do you think of the transformation??  Have you renovated your bathroom recently?  I would love to hear about it!!