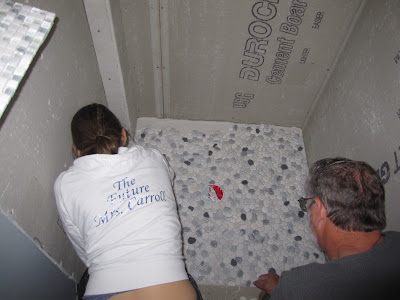
I have been procrastinating this project for who knows how long, and last weekend I finally decided to check it off my list. We went with a product called river rocks that are available at Home Depot. They come in 12 x 12 in. mesh-backed pieces and you just place them side-by-side to get a cohesive look.
Here is what they look like all laid out:
I placed them from the drain in the tub outward to get an idea of where I needed to cut. The best part about the mesh backing is that there is no need for a tile saw. I just used the scissors to make each piece fit perfectly. Once I had it all laid out, I transferred the whole layout from the tub to the bathroom floor so that I would remember which pieces fit where.
Then I just spread out the tile adhesive, OmniGrip (available at Home Depot), as evenly as possible across the whole floor. The contractor who installed the shower drain for us put a layer of concrete in the shower stall to level it out and make sure there was a bit of a gradient towards the drain. So my job was really to just keep the tile adhesive as even as possible to allow for that gradient to remain. And in doing so, the tiles came up evenly with the drain. If they were too far under, water would pool around rather than travel into the drain. And if they were too high (because of too much adhesive), then the water would have to travel up to get into the drain.....not likely. Surprisingly, it worked out and everything was even.
Here are some process shots:
My trusty sidekick (Dad) helped me lay them all out and figure out which pieces could fit where. It was almost like doing a puzzle. I had to individually place a few stones here and there around the perimeter, but for the most part, it was a quick process. Oh, and please excuse my outdated outfit. I still like to feel like a bride-to-be every once in a while. Haha. This poor sweatshirt has seen almost every home improvement project we've done. It's been through a lot!
So, after waiting 24 hours for the adhesive to dry, I grouted over the tiles. I went with DeLaurean Grey (like Back to the Future..awesome, I know). I used the same color on the backsplash, the half bath redo and the basement bathroom floor and loved it, so I figured I'd stick with what works. Plus, I had some leftover....and I hate to waste!
Here is the grout going in:
Yes, it is the next day and I'm wearing pretty much the same outfit. Different pants (and underwear, of course), but the same sweatshirt. It's almost like I'm superstitious about it....if I don't wear it, then it won't come out as good. Who knows. I'm just a little crazy after all of this renovation. My process for grouting was just to spread it evenly across all the tiles, making sure it filled in all the gaps between rocks. Then once it dried a bit, maybe 20-30 minutes, I would take a clean sponge and wipe off the excess from the stones. It took a few passes, but they came clean eventually and left me with this:
Sorry for the small pictures. My cameras are both charging, so I took this with my iphone and it didn't come out great. EEK! Better pictures to come when there is more progress. I had to buy a new blade for the tile saw since it had become dull after so much use. I plan to get started on putting up the subway tile this weekend. Yes, I know its mother's day, but I just want to finish it. This basement project has gone on long enough!!
But until then, I have a little sneak peek at an addition to the basement that arrived this week......
Can't wait to tell you more about it!
Before I go, I'll just do a quick before and after.


Looks fantastic Heather! You have done such a great job. I love the pebble tiles. Can't wait to see it all finished. Ange
ReplyDelete