
So here is where we started last week:
Bathroom


Kitchen


Neither room started off that badly. Trust me, I've seen a lot worse in my own house.....actually, I'm not sure I've even shown you guys my upstairs bathroom......well, there's definitely a reason for that. Back to their house though, we weren't dealing with a total disaster here, they were just looking to update the bathroom with a new and more functional vanity, wainscotting along the walls, a new tile floor, a medicine cabinet in front of the vanity rather than on the wall behind it (as seen in the first photo shown earlier), and to patch the hole from the existing medicine cabinet. They also purchased new hardware to tie everything together. As far as the kitchen went, it was already updated with stainless steel and nice cherry cabinets, but they were looking for something more. And a backsplash was just the solution. We checked out a lot of different tiles and ended up going with a glass tile mosaic. I had never worked with that before, so it was a first for both of us. For all of my DIY tile projects (read more about them here, here and here) I used thinset and mixed my own grout, but since we were dealing with such a small space here, we decided to try a simplemat tile setting mat (see below). I have read about them in numerous DIY blogs over the years but never tried it myself...until now.

And I have to say that it was DEFINITELY a lot faster and cleaner than using thinset mortar. No mess to clean up after and you don't have to wait to grout. The only downside was that it is VERY sticky so you have to be careful that you lay the 12x12 mosaic sheets (or whatever tile you are using) right the first time or it is a pain to try to peel back off and re-lay it. Overall though, I would highly recommend the product though for a quick and easy DIY project. We were honestly done laying the tile in about 40 minutes.
Here are a few photos during the tiling process:


LP picked up the tiling process really quickly, so she ended up doing most of it while I just "supervised." She did a great job!! 12x12 mosaic sheets are so easy to use too that it made the whole process that much easier. If we needed to cut around an outlet or corner, we could usually just cut the mesh backing as needed and continue on our merry way. We actually only needed to cut (with a wet saw) 5-6 individual tiles around the edges of the outlet. We really lucked out with the spacing! And speaking of spacing, the 12x12 sheets are also great because they come on the mesh backing already spaced, so you don't need individual spacers for this project. Another step eliminated!!!
The last step, and probably the most tiresome was the grouting. With the way the schedule fell this weekend, we didn't have time to do the grouting before we left, so LP tackled this on her own Tuesday and Wednesday. It was tedious but it came out really nice. Here is the final before and after:


All in all, this was a really simple update that made a big impact on the look and feel of the kitchen. It seems a lot more finished now, don't you think???
Well, now I guess I should get on with the big renovation of the weekend. You are probably holding your breaths waiting for this reveal, so without further ado.....here are some shots taken throughout the weekend so you can see the progress.....


Here, you can see here that the floor and the mirrors/medicine cabinet has been removed and we have started patching the holes and putting up the wainscotting.....
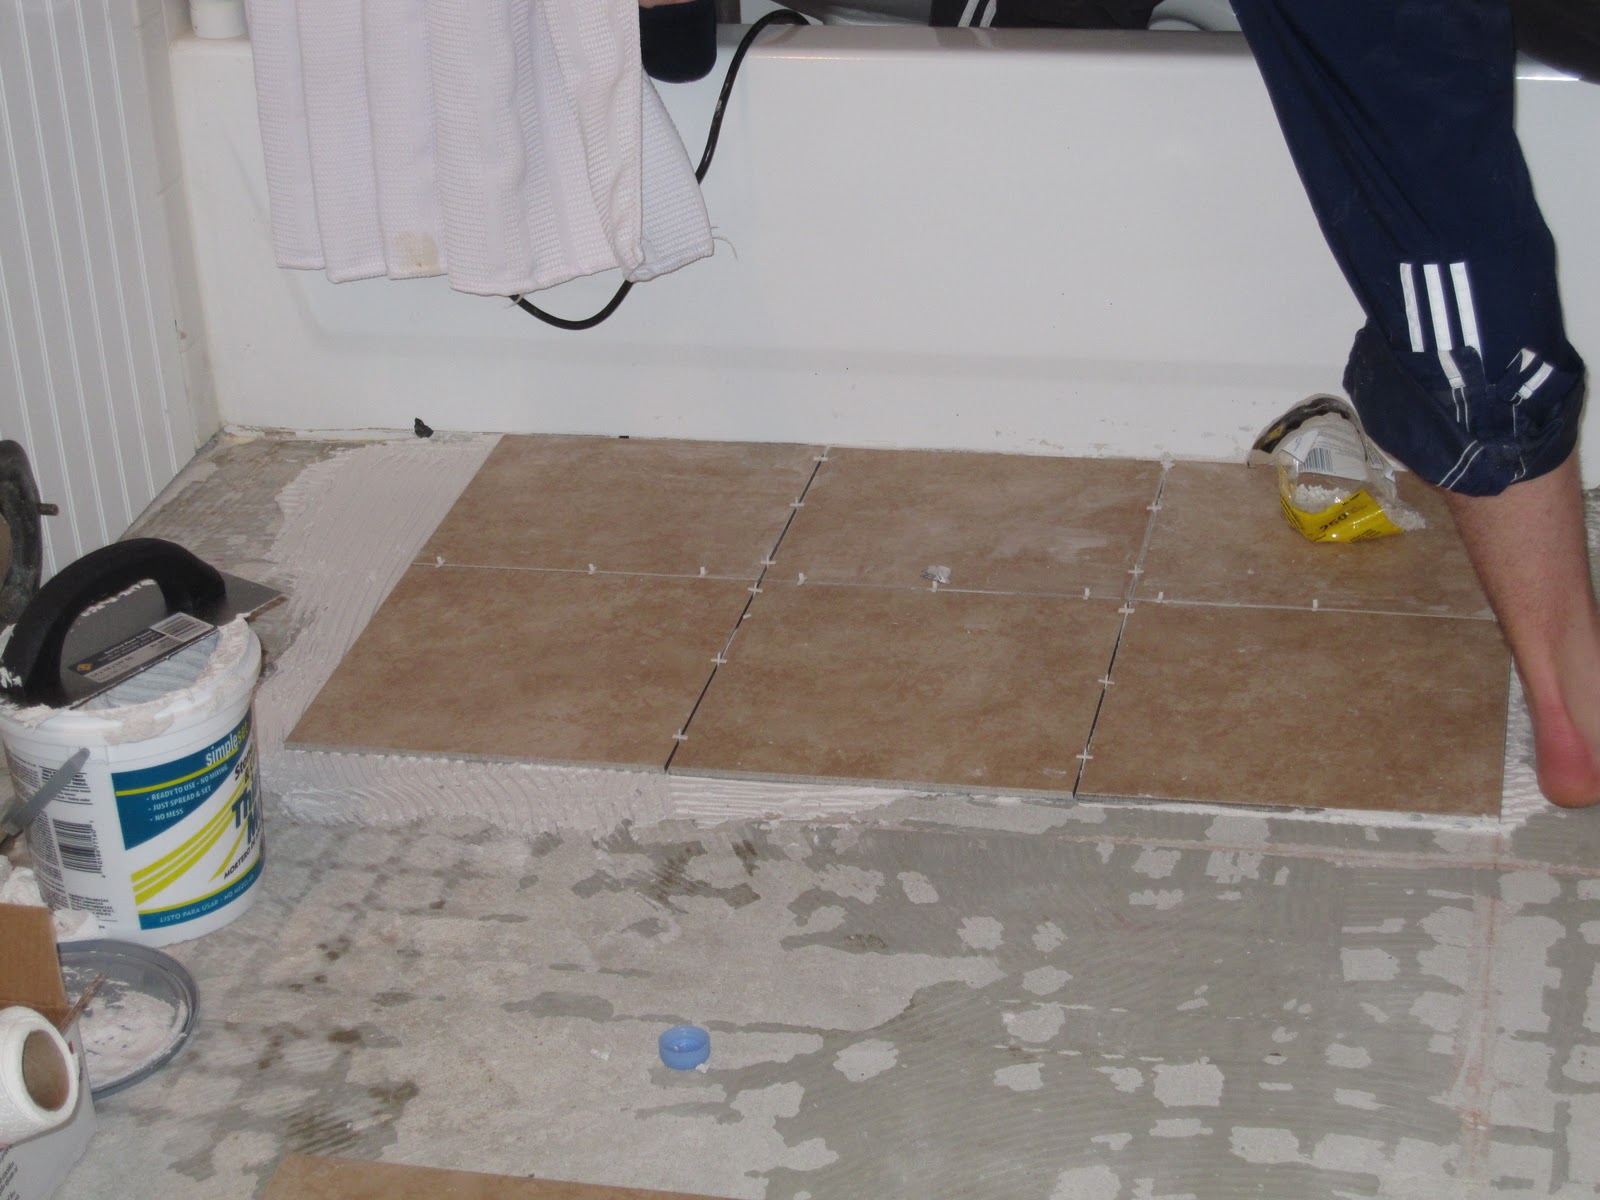
We laid out all of the tiles first to see what the best configuration was (i.e., least amount of tile cuts)
and then started laying from the tub back out. This is important so you don't tile yourself into the
tub/corner of the room!!!


Before grouting, we were able to put up the rest of the wainscotting around the room. Next, we grouted the floor and wiped off all the excess once it had dried a little. The final steps after that were just to install the rest of the molding and the fixtures. As you may be able to see in the pictures, the toilet was hanging out in the tub until we could re-install it. That made it so we didn't have to carry it all the way outside (since we were working in a condo unit). The vanity was new, so we just had to anchor that into the wall and then attach the granite top to it using some silicone caulking. We purchased the granite top with the sink already undermounted to it, so that saved us a step as well. I highly recommend this to anyone considering a DIY bathroom renovation in the future!! And finally, we did all of the finish work (filling in holes with wood filler or paintable DAP caulking, installing the faucet and other fixtures and painting the wainscotting and touch-up areas on the blue wall. VOILA!!!
Here is the before and after:

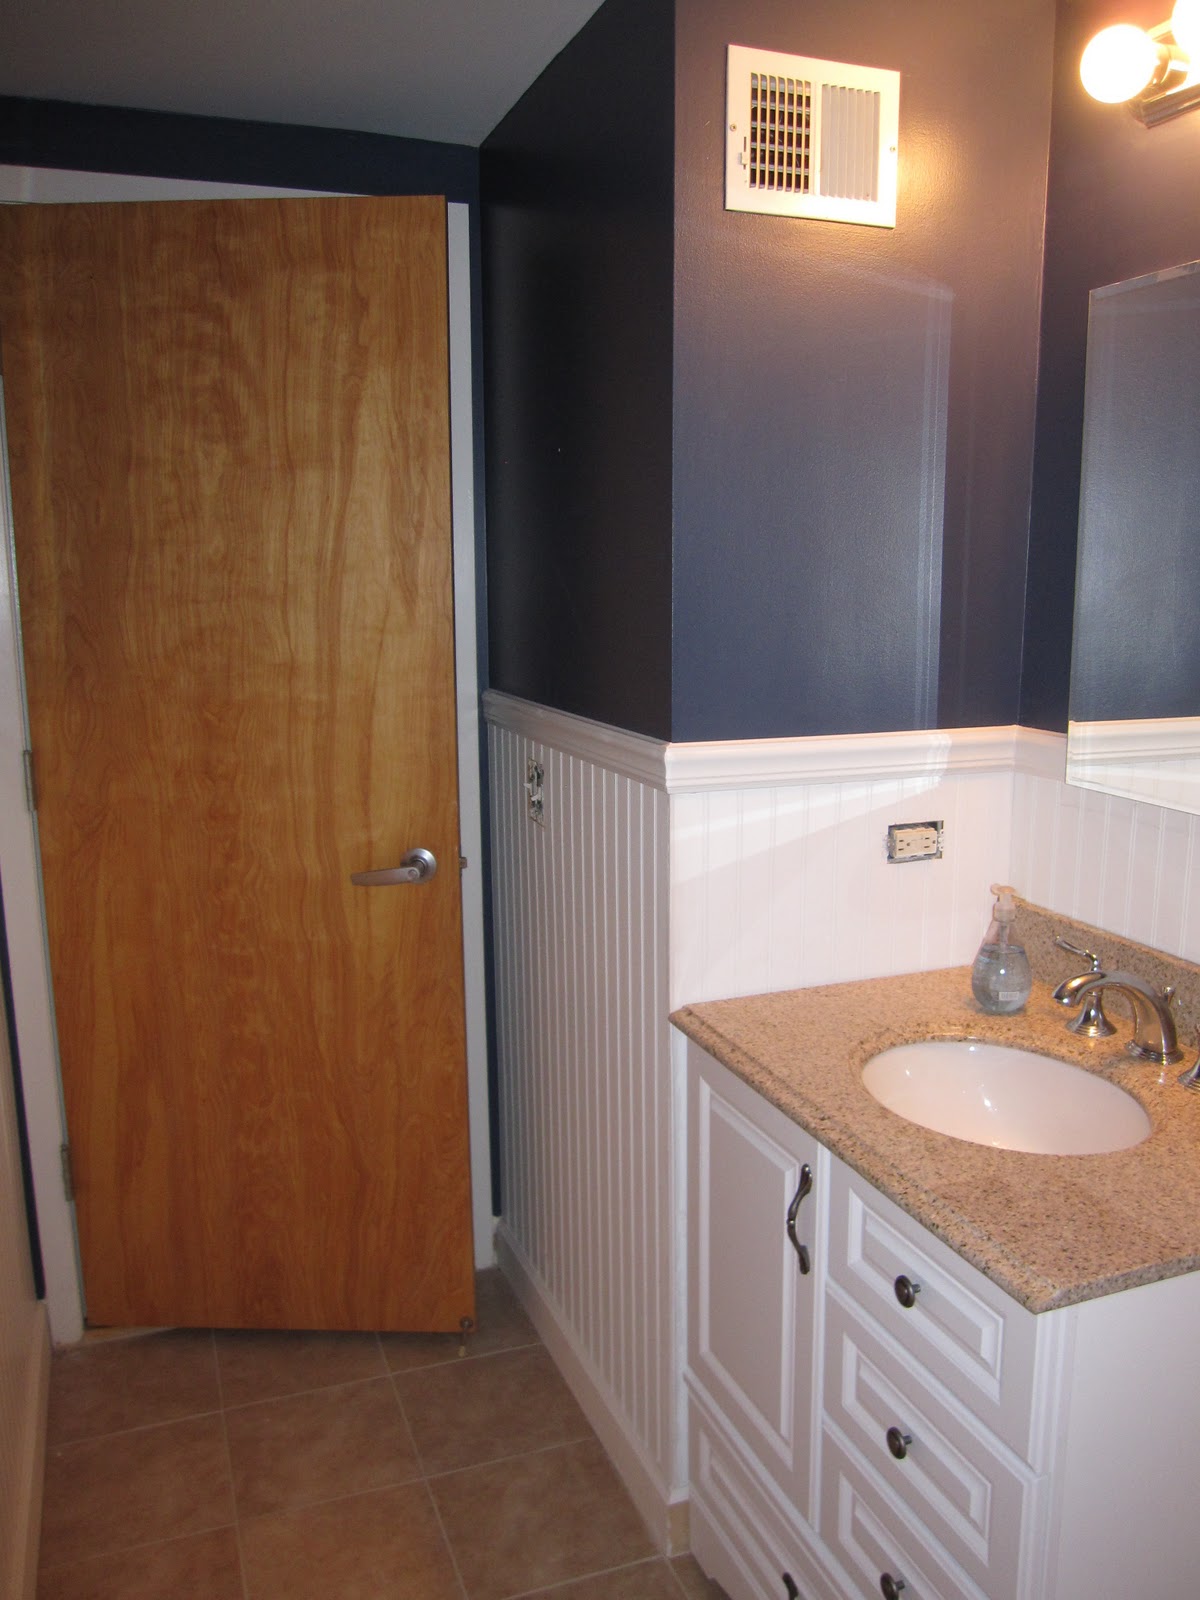

So there it is folks. It doesn't seem that a dramatic update in these photos for some reason, but it made a world of different in their bathroom. Not only is it more functional with the new vanity and the re-placement of the medicine cabinet, but it is also a lot brighter and cleaner looking than it was before. The small white tiles on the floor were dirty and cracking, not to mention outdated, so the larger 12" tiles really helped to clean it up and make it more finished.
And I know what you are thinking.....do I only use blue paint and white wainscotting in bathrooms...haha! They actually already had the blue paint (Benjamin Moore - Newburyport Blue) on their walls before we started this project and they just happened to want the white wainscotting as well. Maybe its a New England thing (since they are from here)......who knows? What do you think of the transformation?? Have you renovated your bathroom recently? I would love to hear about it!!


Thanks for posting, Heather! Nice recap. Just wanna mention we still have some minor touch up painting, hardware installation and picture hanging to do. And, we will probably change out the light fixture. Will update your bloggers with a true "final" reveal when we've tackled all those loose ends.
ReplyDeleteLoves the tile!!! The colors are so warm...great job!
ReplyDeleteI absolutely loved this post—it’s always exciting to see the aftermath of a big house transformation! The balance you’ve achieved between comfort and style is truly inspiring. It’s clear that a lot of care and thought went into every design choice, and the end result is a space that feels both functional and beautiful. The open layout and natural lighting really enhance the overall ambiance, making the home feel inviting and fresh. For homeowners looking to undertake a similar project, partnering with experienced professionals like R for Remodelers can be a game-changer. They bring the vision to life with attention to detail, craftsmanship, and a personalized approach that ensures the finished product matches both style and lifestyle needs. Thanks for sharing your journey—it’s both motivational and full of great design ideas!
ReplyDeleteIt’s impressive how you tackled the aftermath of these home challenges! Proper plumbing repairs are crucial in preventing further damage and ensuring everything functions safely. I also found some helpful information about professional plumbing services that can assist with repairs and maintenance to keep your home fully operational. Thanks for sharing your experiences!
ReplyDeleteI’m really impressed by how you handled everything after the big “house crashing” situation — it takes determination and resilience to get through moments like that and still push forward with your renovation goals. Issues like these remind us how important it is to make sure essential systems like plumbing and drainage are installed and maintained properly to prevent even more headaches down the road. I also found some helpful information about professional plumbing services that explain how experts handle installations and repairs to keep systems running efficiently and reliably. Thanks for sharing your experience and letting us follow along!
ReplyDelete