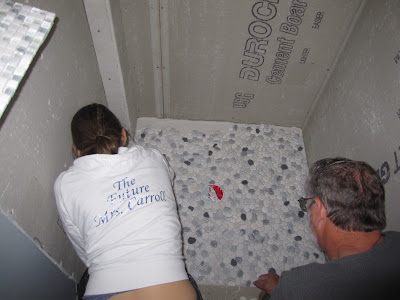
Slowly but surely, I am finishing up this bathroom. Any extra time that I've had over the last two weeks, I have dedicated to this shower. An hour here, two hours there. Luckily it is pretty easy to set up and take down this kind of project, since my tools consist of a bucket of thinset mortar and a trowel (and the tile saw every few rows or so), but I really need a solid 8-10 hours to really put a dent in it. It is relatively easy work once I got started.....but it is painstakingly tedious. The planning and measuring was really the hardest part. I think I mentioned in my last post about the bathroom (here), that the shower floor has a slow gradiant to allow for the water to flow to the drain. Because of that, and since I wanted the subway tiles to be perfectly level, I had to draw out a start line along the bottom edge to make sure that the first full set of tiles would line up perfectly all the way around the three sides of the shower wall. To rectify the small gap that was caused by this, I am going to use thin pieces of subway tile in the brick pattern underneath that first full row to fill in the space. You can see these strips have been cut and placed in the last photo above. Once it is all grouted and finished, you will not notice that at all.....hopefully!
I considered just starting the rows of subway tile right on top of the rock floor, but that would have made it difficult to match them up around the edges....and would have made the rows a little angled here and there as well. EEK! Not acceptable. I am a perfectionist (if you haven't already noticed), and it would have bothered me more to have two subway tiles not meet in a corner than to have a few thin pieces along the bottom. I am looking at those pieces as a sort of molding or trim anyway. That makes it seem a little more deliberate.....or at least I'm telling myself that. And in the end I think it will look nice when all of the sides match up. It will be more of a continuous look for your eye to follow.
The threshold was the next hardest part of this project, but only in terms of the cutting. We found an 10' x 5' piece of carrera marble at Lowe's and cut it down to size with our small tile saw. The blade could handle it, it was really just guiding the heavy piece through that took a lot of time.....and strength! But after a few minutes of sweating and praying that it wouldn't crack from the pressure, we had a custom-fit piece of marble to attach on. We cut it a little wider (or deeper, depending on how you are looking at it) to allow for a small lip on the outside edge. I thought it looked a little cleaner that way. In the shower, it meets up perfectly with a bullnose tile (to be shown in the next post).
So that's where we are in the whole basement renovation process. It is coming along, just not as fast as I would like. My parents are coming up this weekend to help out, so hopefully I can get a full day of tiling in and see how far that gets me. I'm getting nervous around the left-side of the shower where there is a little jut out in the wall, though. As you can see in the photos, I have been avoiding it so far. I'm thinking that I will use some bullnose tile to make the corner a little smoother, but we will see how it all looks. I will post about that next week!
Oh, and I hope everyone had a great Memorial Day weekend!!! We went up to Bar Harbor to visit my in-laws and it was peaceful. I know that's sort of a boring way of describing a trip, but they live pretty far off-the-beaten-path. Hm....that doesn't quite describe it. Let's just say, when you think you've driven to the edge of the earth, its another 40 more miles......yea, that far....so it was really quiet and relaxing once we finally got there. I actually had a pretty nasty head cold, so I slept on and off most of the time and read my book on the deck while everyone else took turns watching Pace. Even though I didn't feel great, it was nice to be off-duty for a little bit. And it's always fun to watch other people chase after him (since he's crawling and table-walking.....or rather, wobbling from one piece of furniture (or leg) to the next while trying to hold a toy in both hands...haha) and then look at me and say "I don't know how you do it". I realize that my job isn't as intellectually stimulating as it used to be, but it is 10x more draining and physically demanding than it ever was. To all of those people that asked me "what are you going to do with all your time" when I first decided to stay home, I am currently accepting babysitter applications. He's all yours! :)
He is truly at an amazing age though. He discovers something new every day and its wonderful to watch. I am definitely exhausted, but its worth it.....every minute!

.JPG)
.JPG)
.JPG)


