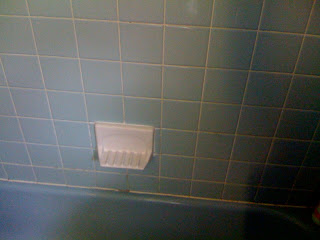
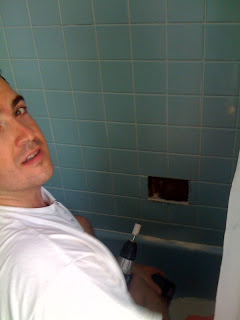
As I mentioned in this babymoon post a few weeks ago, the soap dish tile in our bathtub fell out the other day and smashed into about 40 pieces when it hit the floor. Ugh! We were disappointed, and a little dumbfounded, to say the least, but we weren't necessarily surprised. The tile work was original to the house, so we are talking about almost 50 years of wear and tear on that grout and caulking (which hopefully explains the amount of dirt and grim that you will witness in the following photo.....I SWEAR that I've tried to clean it)!!
Lovely, right? If you are wondering what the weird film is over the hole, oh that's just some saran wrap and packing tape. Haha. It was the first thing that came to mind when we needed to take our next shower. I used all of my girl scouts knowledge from eons ago and came up with this combination. Not pretty, but it worked for the time being, especially since a full bathroom renovation just isn't in the budget right now. And we certainly couldn't leave the hole exposed, since it went right through to our bedroom wall and the moisture from the shower would get in there and eventually create mold and mildew......EW! So, off to Home Depot we went.
And we returned with this beauty! For $6.98, it was the quickest fix I could think of until we have the money to renovate the whole bathroom. It was the only size available, and of course they didn't have the lovely blue version in stock at the time (haha....I'm actually pretty sure they haven't manufactured the blue tile version for about 30 years now). But since it was a temporary fix, we thought that white would work just fine.
The only problem was that the new soap dish was a weeeee bit bigger than the existing hole....of course! But not to fear, my genius husband picked up a $3.47 grinding point at Home Depot in case something like this happened (since I NEVER would have thought of that). The grinding point just attaches to your drill and the rest is history.
It took him about 5-10 minutes of grinding to get a perfect fit.....and we only had one minor setback during that process. While he was testing out the fit, he turned around to get my attention and let go of it.....which made is crash down into the tub (a la the blue soap dish of yore) and the edge chipped off. Oops!!! We considered going back out to HD to pick up another one, but after playing the "not it" game for a few minutes we realized that the chip wasn't going to affect the integrity of the soap dish, so we would just patch it with some quickset mortar and call it a day. Normally I am all for perfection, but since we know that we are going to renovate down the road, it just didn't make sense to run out for another $6.98 soap dish that we wouldn't use forever.
Unfortunately I didn't take step-by-step pictures of the grouting and caulking process, but it was a pretty quick process. We already had some quickset on hand from the backsplash project back in the fall, so we used that and put a healthy dose of it on the back of the soapdish and held it in place while it set for about 10-15 minutes. At that point, we let it fully set on its own for about 5-6 hours and used caulking to seal the edges around the existing tile. I believe it was just DAP waterproof stuff in white.
 |
| Here's B holding the tile in place. I think he had envisioned us taking turns holding the soap dish in place while it set a little.....but I preferred to document the process while he SUFFERED!! Hehe |
 |
| Please try to ignore the DISGUSTING grime that lives in the grout of my shower. As much as we try to scrub it, it just doesn't get any cleaner. And now that we know that some of the tiles can just spontaneously fall off, I'm going to scrub a little softer so as to not encourage anymore from jumping ship..... Oh, and you can totally see the outline of the chip in this close-up shot. Does it bother me? Yes, but do I care enough to re-do the entire project.....HELL NO!! |
 |
| From far away, the grout lines don't look as bad...but you now know the truth!! EEK! |


A job well done! Don't you just love it when you find a reasonably priced fix to what could be a big problem. Enjoy the new soapdish. Ange
ReplyDeletethis happened to our friends too before they renovated. they did something very similar to what you did. it looked fine!
ReplyDeleteLove easy fixes! I have that same tile in my bathroom. My grout used to look the same too, but I roughed it up and went over it with sanded grout from Home Depot. Looks a billion times better.
ReplyDelete