Showing posts with label Decor. Show all posts

6.28.2012

Gallery #2

Since I was on a roll with the gallery in the basement, I thought I would just continue the madness upstairs in our hallway.  I bought frames for this project almost a year ago and just didn't get around to completing the project until now.  For some reason I was intimidated by it all....where would I hang them, what would I put in them....etc.etc.  Enough intimidation to make me put off action for 12 months.  Crazy!!   Plus, it is upstairs.  No one but me and B really see that space, so that also factored into my hesitation.  But....I was inspired by how easy it was to put up the frames in the basement, so I just up and printed a bunch of photos, laid out the newspaper cutouts on the wall (after measuring and moving them around 15 times) and hung them all up.

Here is what the hallway looked like when we moved in....


I have a lot of things to say about this photo, but my mother always told me that if you have nothing nice to say than don't say anything at all.   So....moving on.

First, we ripped up the carpet and (phew) there was hardwood underneath.  We refinished it and stained it darker (along with the rest of the floors in the house) a red mahogany color.  We hired someone to do that work since it was the whole house and not one room.  But we decided to refinish/stain the banisters and replace/paint the spindles ourselves.  That was not an easy project, but I think it is totally worth it.  It really brightens and cleans up the whole space.

Here it is after a little paint and stain.....and a new light fixture....


And also in the process of updating this area, we decided to paint the doors black.  B was gung-ho (sp?) about this but I have to admit being a little skeptical.  The whole plan for this house was to clean and brighten everything....and black felt like it would create the opposite effect.  But, after a few weeks of listening to his rationale and obsessively googling for pictures of black doors on the internet, I decided to jump on board.  And I have to admit (although I hate to) that I really love it.  For more info about this process, check out my post here from 2010).

This is what the hallway has looked like since August of 2010.  It is 100 times better than it was when we moved in, but it was still pretty bare....until now.


The only tricky part about this project was working around the thermostat.  Otherwise, I just started out with a straight line in the center and worked up and down from there.  I scattered the basement gallery a bit more randomly (more on that here), so I thought I would try something different upstairs.   I bought all of these frames at Michaels on sale a year ago.  I think I got this whole slew of frames for around $100 since there was a 50% off promotion plus a 20% off extra coupon (or something like that).  That is less than $10 a frame, so it was a steal!!  The rug was from IKEA a little while back.  Not sure if they still have it, but I have three of them throughout the house.  One in the hallway downstairs and another in the kitchen in front of the sink.  They were $15 each and they have been AMAZING!  I think they still have the same type of rugs available, just not the same colors.  The biggest reason I love them is because they are machine washable and they come out looking brand new.  Perfect for kids!!!

And I almost forgot to mention the horse painting.  This is my favorite new addition to the hallway.  B bought this for me for my first mother's day.  I have been talking about a horse painting ever since I met him and he finally found one for me.  It is so nice to look at it every morning when I wake up to head downstairs.......even if it is 5:00am.

So that's it for galleries this week.  I am thinking about doing a little three frame thing in the downstairs hallway, but only if I can get another good deal on frames.  There isn't anything on the wall at the moment, so it looks a little bare.  Just not sure what to put in the frames yet so I am holding out on the project until then.  Upstairs was easy, I just found a picture for every place we have traveled.....plus a picture of my belly when I was pregnant (of course).  It is sort of a random assortment of photographs, but I thought it seemed relatively cohesive since they are all black and white. 

The beauty of a project like this is that you can always remove and replace the photos down the road if you have a change of mood or decor.  And knowing me, that will be sooner rather than later.  Or, in keeping with the timeline of this project, maybe I will take another year to plan it out!  Who knows??

Have you done any galleries in your home recently?  I am obviously loving them lately since I have done two in a matter of a few days.  If so, I would love to see what you are working on....

And before I leave you, let's do a quick before and after.


Before
After

6.26.2012

Got Frames?


During my a few naps (aka "free time") last week, I put together a little gallery for the basement wall.  I haven't done much in the way of decorating the space thus far, so it I am excited to have something up on the wall to make it feel a little more finished down there.

Here is a peek at what it looked like before we started the whole basement project:


Not the best angle, but you can sort of get the idea.  It is the left-most part of the photo, where the two patio chairs are....

And a few more progress shots along the way... 


I already had 10 of the 16 frames (plus the letter "P") from other places in the house, so I just ran out to Michaels and picked up the other 6 for 70% off.  They were on sale for 50% and then I had an extra 20% off coupon with me.  SCORE!  No real reason why I chose 16, it just ended up looking good once I laid it all out along the wall.

Most of the frames that I already had weren't white though, so I had to spray-paint them with some leftover primer and white semi-gloss paint that I had on the shelf (I think they were both Krylon).  


Next, I placed all of the frames on the floor in front of the wall to see how they would look arranged.  I probably changed them around 15 times before I got a winning layout....


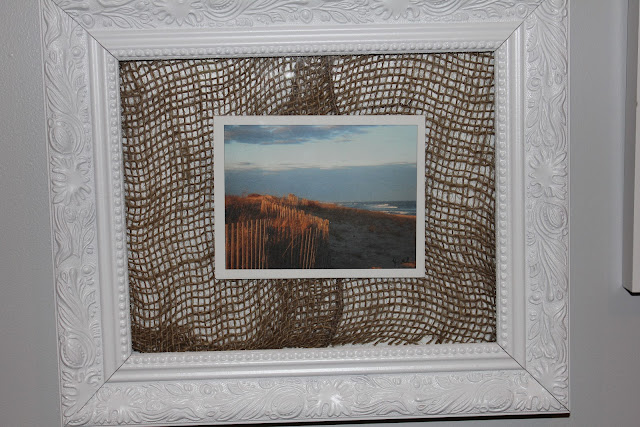
Then I started to fill the frames with photos, posters, fabric remnants, pillow cases, etc.  Random things, but that was sort of the look I was going for.  Anything that fit a sort of nautical/navy/lime/turquoise theme.  I even had a sand dollar and some burlap, so I laid out the burlap as a border and placed the shell in the center.

Map of Ireland

An extra letter "P" from Pace's room, the #13 boat was from the navy yard sailing club that we used to belong to when we lived in Charlestown, then there is a print we got in San Fransisco a few years ago and a postcard from where we got married in the bottom left.  The top right is part of a piece of paper that I got at Paper Source for $0.25 a while back, the photo on the right is the view from our old condo in Charlestown and the bottom right is a wedding envelope invitation I kept....          here's a closer look...
I love the cool vintage stamps.  Such a great idea....
The whale is a print on a piece of fabric.  I bought this on vacation in St. John a few months ago and had planned to make a pillow out of it.....but it fit in this frame pretty well so I'll keep it in there for now.  The card above that was from my brother and sister-in-law when they found out we were pregnant.  I love the saying ("Life is a series of thousands of tiny miracles")....so true.  The fabric behind it is actually a sample that I got in the mail from Tonic Living when I was checking out different fabrics for Pace's nursery.  Love that website!  Go check it out if you haven't already.  And then there is the sand dollar that I backed with some burlap.  Closer look here....


And another post card (a little off-center and tilted....oops)....with burlap backing too...


Here is a close-up of the San Fran post card that I mentioned earlier too.  I have only been there once in my life but I loved, loved, loved it.  I wrote more about that trip here.  


And finally, I cut out pieces of newspaper the size of each frame and marked where the slots were for hanging it before taping them up on the wall where I wanted them.  This makes it easier (and less messy) when working on a project like this.  Instead of putting 50 holes in the wall trying to get it just right, the prep work really makes it more clean in the end.


And here is the finished product...


Hmm....I think the "tiny miracles" card in the middle is a little tilted too, now that I see it in this photo.  Oops!!!  We also still need to create a little box to cover up the septic system electrical box (to the right of the photos), but that is for another day......

And just a quick little recap of the project, before and after style:


I'll work on some full basement shots as soon as I can clear out the power tools and make it look relatively presentable. Until then, I'd love to see some of your gallery walls.....

Oh, and any suggestions for what to put in the frame on the bottom left?  There is just a stock photo in there now.  I was thinking of one of these, but I'm not sure which one..


The top one is from our trip to Zanzibar two years ago, the middle is from Schoodic Point in Winter Harbor, ME and the bottom is from Santorini where we went three years ago.  They are all special places for us, so it is hard to decide.  I think the coloring in the top and bottom ones might work best, but I'd love your opinion.....

 Linking up to these fun parties.....A to Z, Sew Much Ado, My Uncommon Slice of Suburbia and Lil' Luna

4.05.2012

Rug Search

We are getting close to the decorating phase of the basement remodel and I can almost taste it.  I enjoy most other parts of the process just as well, but I think this is my favorite.  It is definitely the most fun.  No work, all play makes a happy wife and mom.  I keep telling B that I'm really not that hard to please, but for some reason he doesn't believe me.

To give you a quick update on the progress, the floors are all down and the molding and doors are up but I still haven't started tiling the shower in the bathroom.  That is pretty much the final piece of the contruction phase that is left.  Until I get the time/courage to do that, though, I am investing any free moments into finding fun, affordable, kid-friendly decor.  We already have a couch.  It's a white/blue stripe sectional that we have barely used.  I know what you are thinking, "didn't she just say "kid-friendly decor" and "white" all in the same breath.  Yep, I did.  But thankfully we were smart in our pre-baby days and bought the couch slipcovered and with scotchguard protection as well.  And I say "we" in the loosest sense of the word.  I'm honestly less worried about my son destroying than my husband.  I'm sure there are a lot of you out there that can relate.

At the moment, my current obsession is with rugs.  I want to warm up the space a little (not heat-wise, just fabric-wise) and make it a little cozier down there.  I have looked at a few online, but its so hard to tell how it feels if you aren't there to touch the fabric.  I am leaning towards an indoor/outdoor rug so that we can just hose it off if it gets dirty, but I'm worried it won't be very soft.  My next option is to do a berber material and keep it plain.  I did that for the stairs, but I am just worried it will be too boring.  The walls are a blue/gray, the couch is blue and white and then I would get some sort of blue solid patterned berber rug......hmm.  It just seems too blah.  Definitely practical, which is what I need....but I want it to be a little fun down there.

Any other suggestions for a durable, comfy, soft-ish, cool rug style for a basement? 

Here are some that I've been looking at so far on Dash & Albert:


The first one is wool and the second two are indoor/outdoor.  I used to like hooked wool rugs until I spent most of my days sitting or playing on them.  They shed a lot and I hate having the fibers all over me and my son.  We currently have one in our living room (from Home Goods) and although it has held up pretty well to constant wear and tear and its relatively comfy, I am just not sure I want to go down that road again with the basement.  The last rug from the photos above is a rope pattern which I like.  It's sort of boring since it's just one color, but the darker color is good for kids (or husbands) and the pattern gives is a little something.  I know I said I didn't want berber because it was boring and this is pretty much the same, but I am a woman and I change my mind.  All the time.  Even in the same 5 minutes it has been since I typed about the berber.....ah well.

Long story short (sort of), I bought a groupon for a local Rug Store - The Rug Merchant in Rockland, MA, so I need to buy the rug from them.  Groupons are great, but that means that I'm limited to the brands they carry.  So far, I know that they definitely carry Dash and Albert, but I'm not sure who else.  I will keep looking for inspiration photos and keep you posted.

Worst case scenario, I can always buy a rug for the guest bedroom/office in the basement or the second bedroom upstairs if I really can't find anything for the living area in the basement, but I would really just like to focus on one project at a time.  My brain (and my pinterest searches) can only handle so much at once!! 

1.17.2012

Nursery: Final Reveal

It's been 5 months since Pace arrived and I JUST realized that I never showed you final photos of the nursery.....EEK!  I was doing some cleaning and organizing in his room this afternoon (he is growing out of clothes so fast that I can barely keep up with retiring the old and bringing out the new), and realized that the last nursery posts (here, here and here) left out a few details.

So, without further ado, here is Pace's completed nursery:


No big changes or additions, just a few finishing touches to the walls and the bookcase.  He received sa ton of wonderful books and learning toys from friends and family (which is amazing) as well as a few different personalized banks (pig, noah's ark, elephant and a british mail slot)....I guess people were trying to send him a not-so-subtle message.....SAVE, PACE, SAVE (and don't put it in that crazy market...haha)!!  The bookcase is coming along really nicely.  It's even a little crowded at the moment.  I need to weed out some stuff that he can use now and put away a few things (books & toys for older kid, etc.).  We use a large majority of the books though, so I might just need to stack them differently!  Pace loves when we read to him.  I had heard that babies love when you read to them even before they can understand what you are saying, but I was always skeptical.  But, Pace has proven me wrong....he will sit in my lap and just stare at (or grab at) the book while I read it to him for quite a long time.  We always do a book before bedtime, but I'm finding that he likes to sit down and relax with a book before his naps too.  Hopefully he will grow up to be a book-lover like his parents!  :)

But enough about that, moving on to the other additions to the room:


I made this little piece of artwork just a few days before Pace arrived.  I had planned on blogging on it the day that my water broke....oops!  I had pieces of yellow and white craft paper in the house from an older project and an IKEA Ribba Frame (8x10).  It took me two tries and a lot of patience, but I finally got all the letters to fit in the frame.  All I did was draw out an 8x10 border and measure out equal horizontal lines on the white paper.  I had to sketch and re-sketch the letters a few times to makes sure they would fit in the space, but when it finally came together, it only took about 15 minutes to cut out the letters with an exacto-knife.  I then traced the 8x10 shape onto the yellow paper and glued the individual letters on with rubber cement.  All in all, it took me about an hour (since I also did a second one that finishes the little song, "you make me happy when skies are gray", but decided that I liked the one by itself.   I still have the other one lying around in case I change my mind though (which isn't likely since I had to squeeze those letters a little more and I don't think it looks as neat as the other one).  Only cost about $20 for the whole project because I had most of the supplies at home (and the frames were $9.99/ea). 


We had these letters from Michaels since the second trimester, but since we were keeping the name a secret, we didn't put them up on the wall until after he arrived.  We just eye-balled the spacing when we put them up.  The "E" looks like its a little too high in this picture, but maybe its just the angle of the photo.  Hm.....that's going to bug me!!  Hahah!!


So, that's it folks.  The final nursery reveal.  I am really happy with it and it seems like Pace likes it as well (although all he really does in the room is sleep, so I'm not sure if that is a good thing or bad thing).  I'm sure it will grow and evolve with his little personality over the years, but for now, I think its a great little space for him.


And just for a little perspective, here is a quick before and after:

Before
After


Before

After                   


And speaking of growing....he is just getting so big so fast.  I can't take it!!!


These were taken a month ago, so he is even bigger now!!  I have to take some 5 months shots, so I will update you with new pictures of him soon!  :)


And I apologize for the lack of posts during the holiday season.  People warned me that it is crazy when you have kids and everyone wants to see him.  I didn't believe it, but I do now.  It was a blast but I am a little glad that it's over and we can get back into a normal routine!  YAY!  Happy New Year everyone!!